
Author: Nora Whitfield

  • The Temple I Climbed in Thailand Where Half the Path Is Just Wooden Planks on a Cliff

    The Temple I Climbed in Thailand Where Half the Path Is Just Wooden Planks on a Cliff

    “The sixth level is the most spectacular—and most scary.” Several people warned me as we passed on the narrow stairs, and I admit my heart started racing before I even reached it.

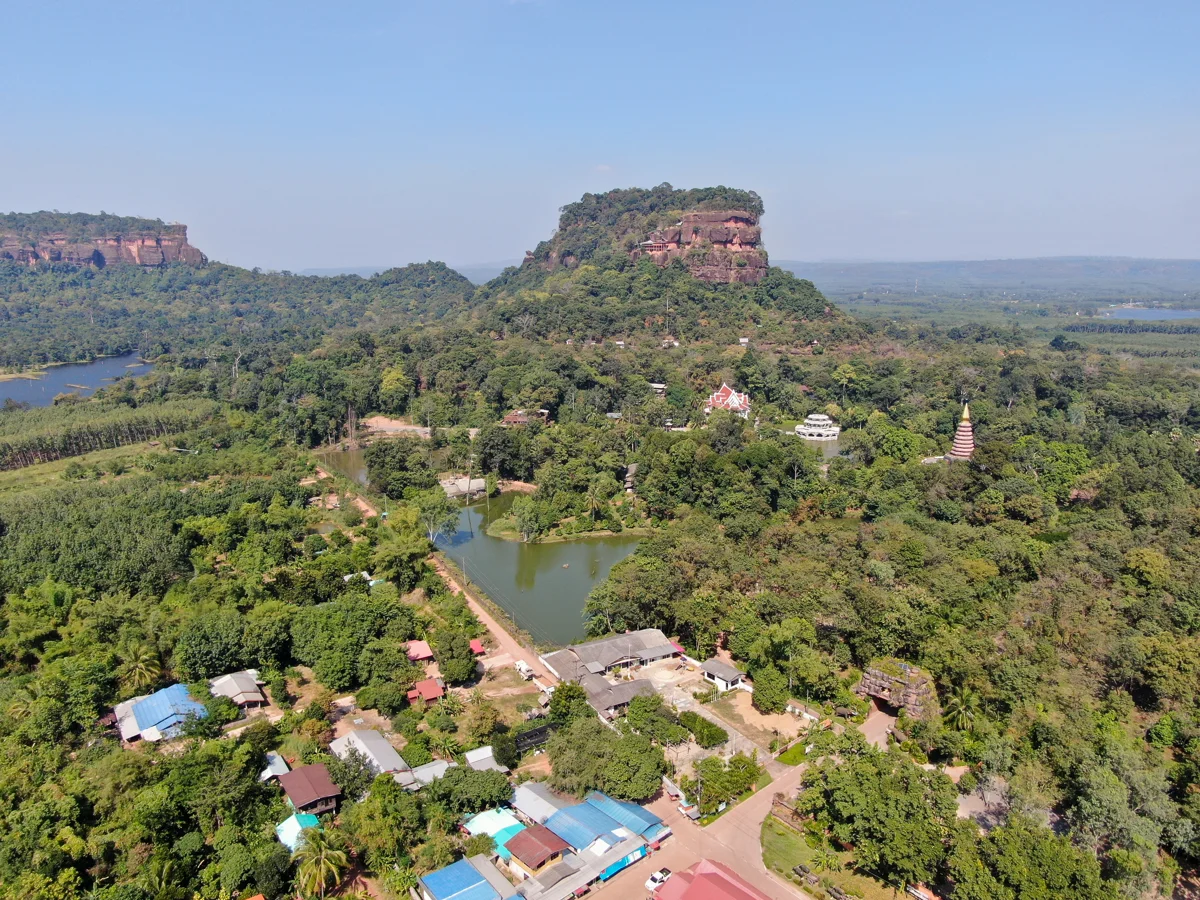
    This is Wat Phu Tok in Bueng Kan province, deep in Thailand’s rural northeastern Isan region. If you love places that feel untouched, this is one of them. Endless space, quiet skies, a mountain that just appears out of nowhere like someone forgot to hide it behind the flat landscape.

    The Temple I Climbed in Thailand Where Half the Path Is Just Wooden Planks on a Cliff - photo 1

    The official name is Wat Jetiyakhiri, but everyone calls it Wat Phu Tok—”Phu Tok” being the local name for the mountain and “Wat” meaning temple. The mountain rises 359 meters from the surrounding plains and literally translates to “lonely mountain.” You’ll understand why within seconds of arriving.

    It reminded me of a smaller, more intimate version of Sigiriya in Sri Lanka—that same sense of ancient rock rising dramatically from the green below.
    The Temple I Climbed in Thailand Where Half the Path Is Just Wooden Planks on a Cliff - photo 2

    A Brief History

    The mountain has always been wild terrain, home to dangerous snakes and thick with vegetation. That combination—isolation, nature, a touch of danger—made it perfect for meditation.

    Monk Luang Pu Juan founded the temple here and began building wooden staircases, ladders, and walkways across the mountain, connecting shrines and meditation spaces. Over time, seven levels were constructed to mirror the seven stages of Buddhist meditation. Tragically, Luang Pu Juan died in an airplane accident before seeing it all completed, but Wat Phu Tok remains one of the most striking temples I’ve ever visited.
    The Temple I Climbed in Thailand Where Half the Path Is Just Wooden Planks on a Cliff - photo 3

    The Climb

    It’s about a 30-minute drive from Bueng Kan city. At the base there’s a large temple complex, a big lake, and plenty of parking—or you can grab a taxi or tuk-tuk if you’re staying in town.

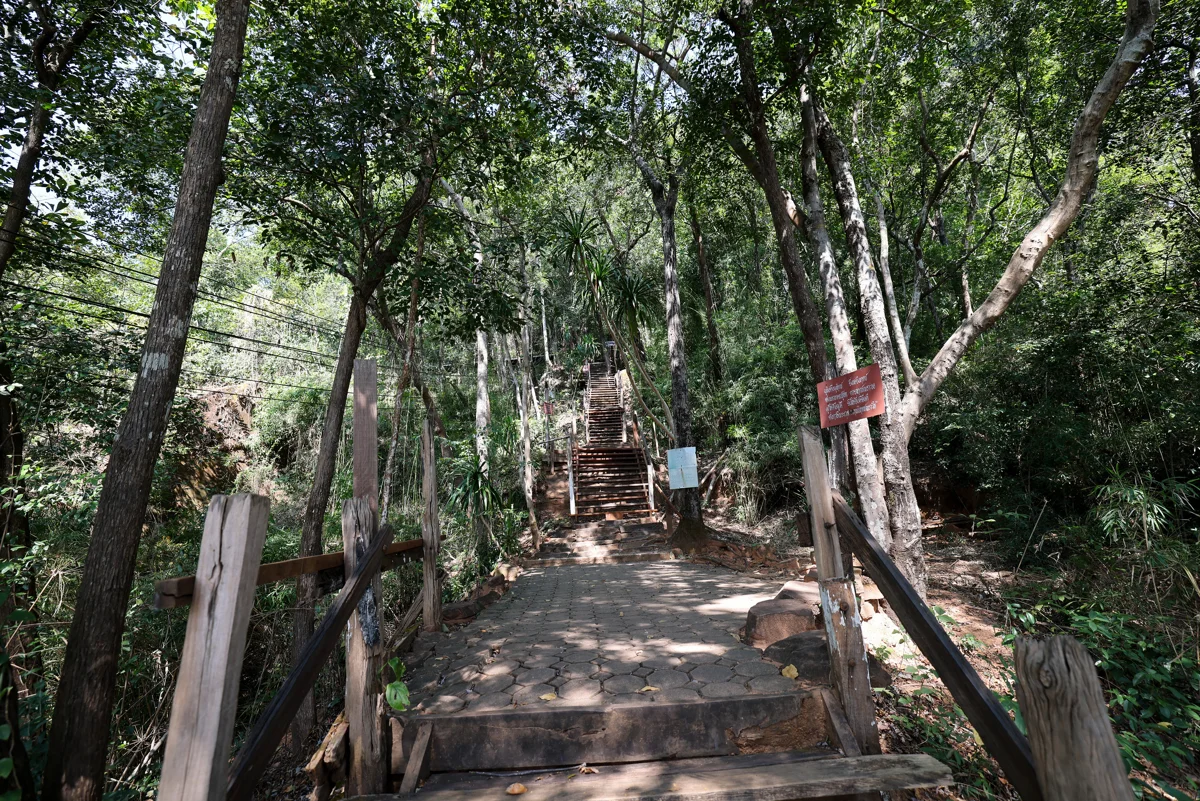
    You can’t miss the trail entrance. Just head toward the mountain, pass through the gate, and pretty quickly the concrete path gives way to wooden plank staircases. The first stretch is gentle enough that I barely noticed I was hiking.
    The Temple I Climbed in Thailand Where Half the Path Is Just Wooden Planks on a Cliff - photo 4

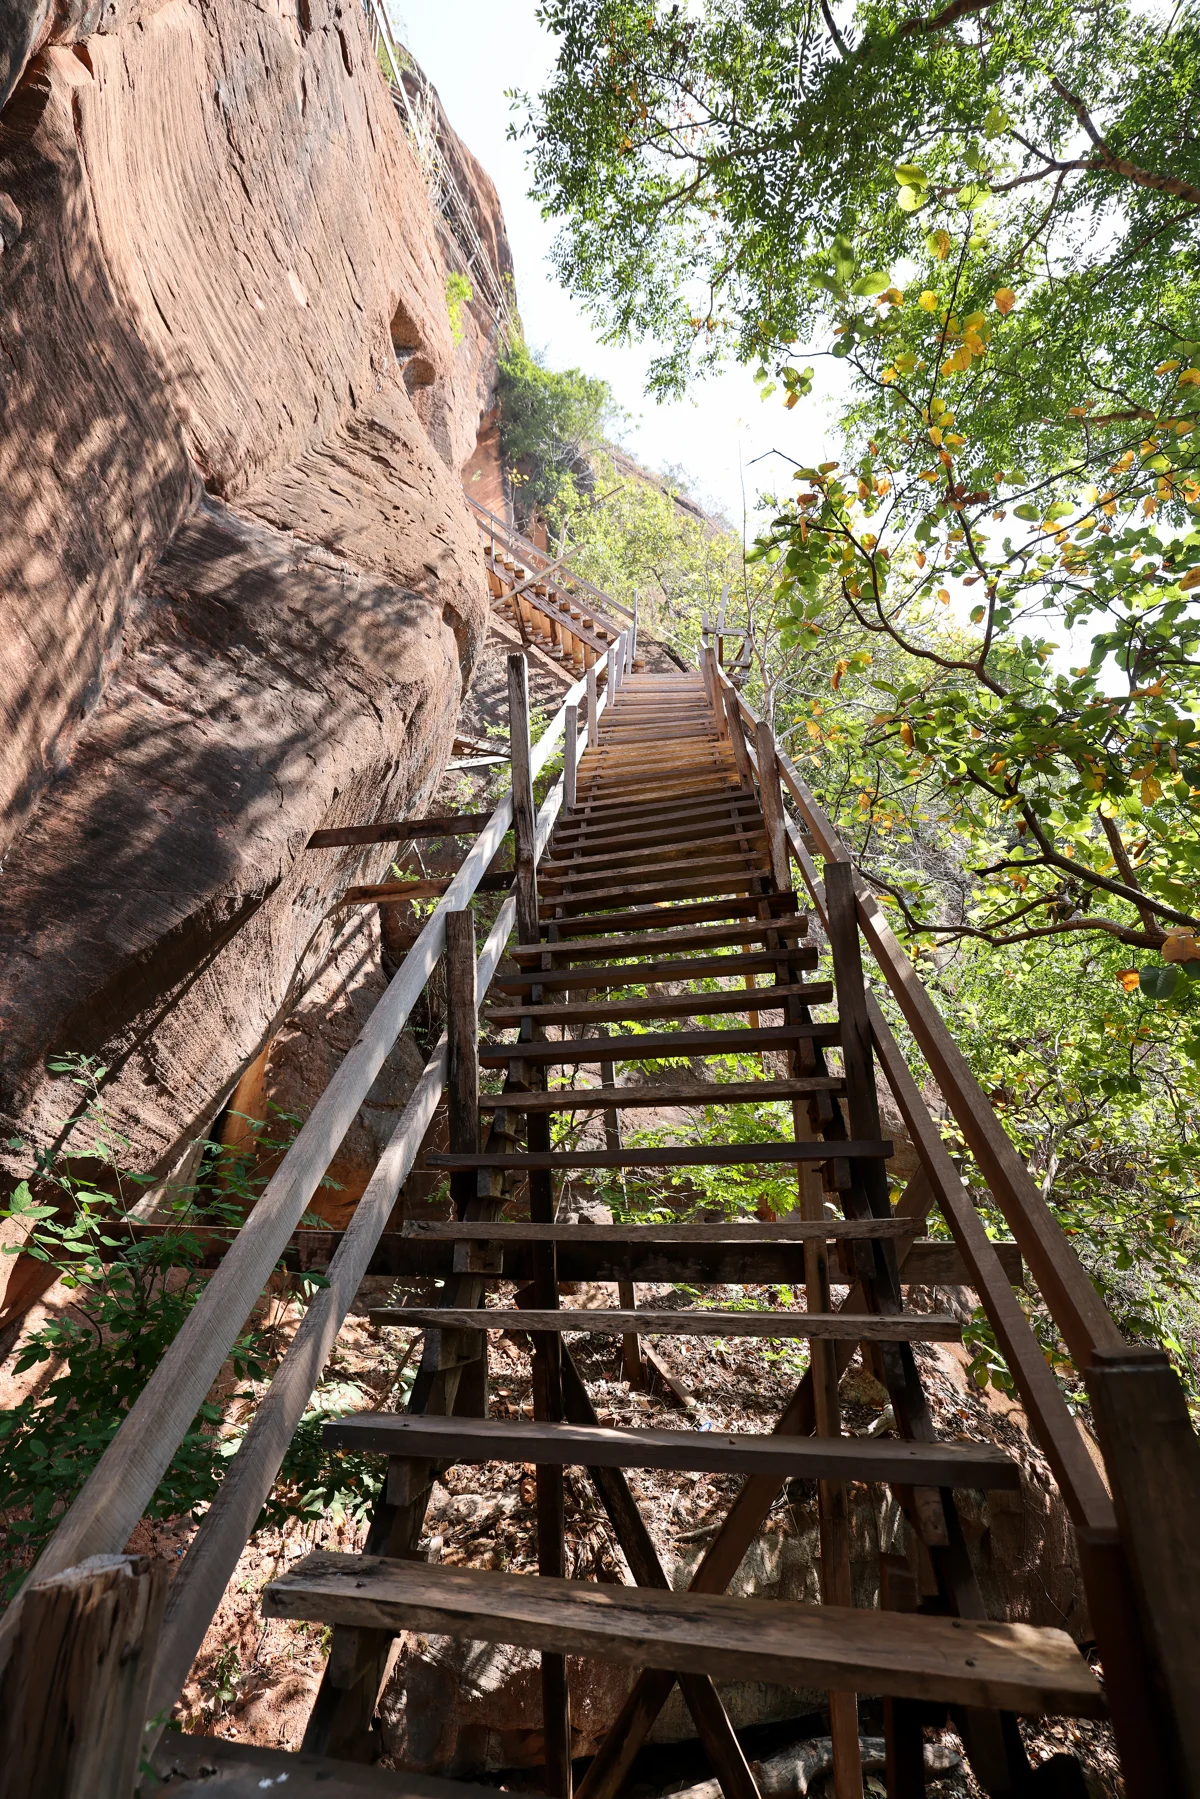
    Then the stairs steepen until they’re basically ladders. Some of the planks flex underfoot and sit at an odd angle, but the whole structure felt solid. I’m not usually someone who seeks out heights, so I’ll be honest—I was both impressed and a little nervous.

    The first few levels don’t have much to see. There are some shrines here and there, but the real experience is higher up. Keep climbing.
    The Temple I Climbed in Thailand Where Half the Path Is Just Wooden Planks on a Cliff - photo 5

    Levels Five Through Seven

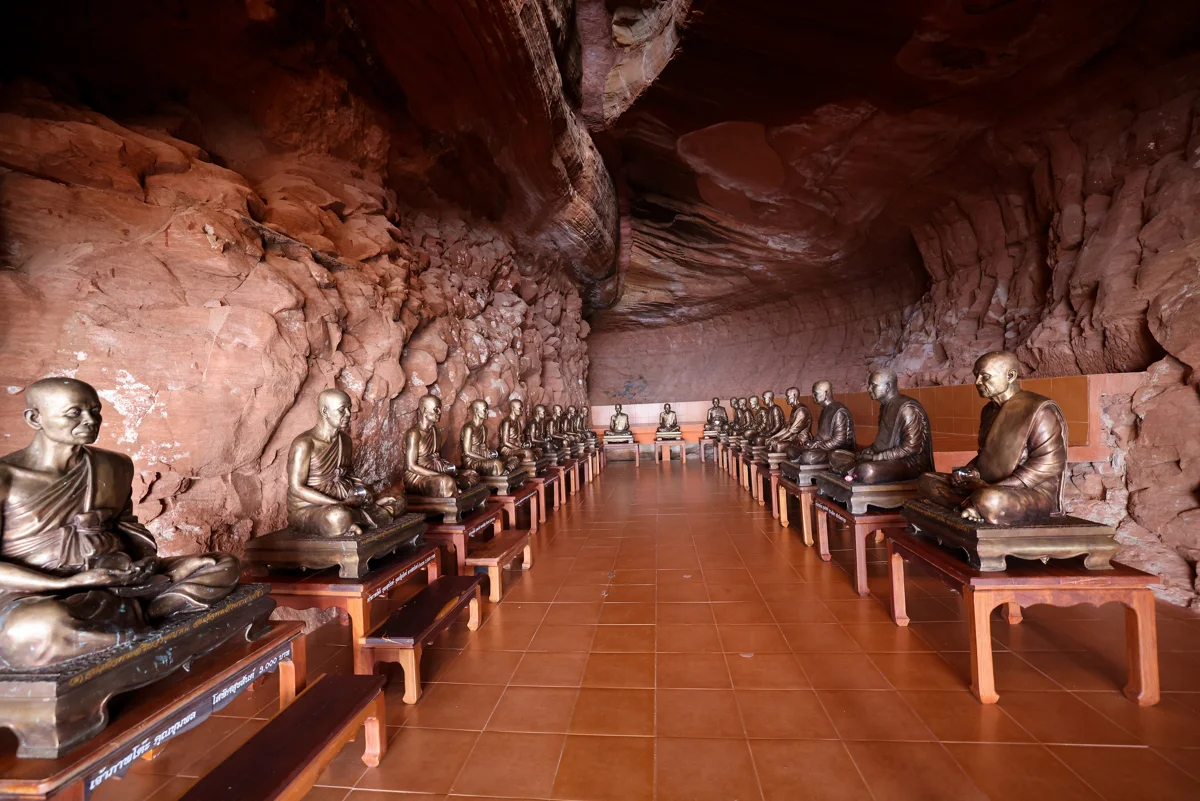
    Level five is where things open up. This is where you’ll find most of the temples, shrines, and halls clustered together. The trail here stays on solid ground rather than clinging to cliff edges, so it feels like a breather before what comes next.

    I think the largest ordination hall sits at this level—a beautiful space that’s easy to miss if you’re rushing upward.
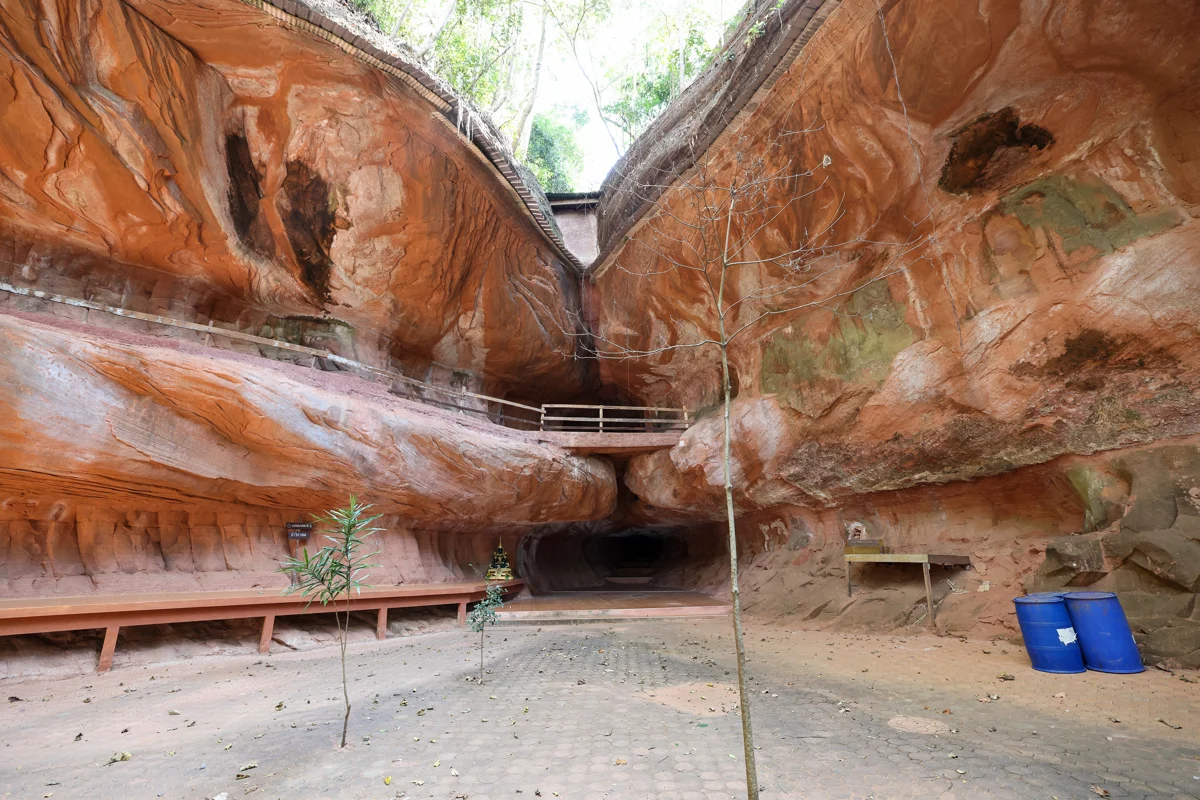
    The Temple I Climbed in Thailand Where Half the Path Is Just Wooden Planks on a Cliff - photo 6

    There’s also a small detour off the main trail worth taking. Follow the path and suddenly you find yourself on an elevated rock walkway leading across a wooden bridge to a tiny temple perched at the edge of the mountain. It’s brief, but it felt like finding a secret.

    The Temple I Climbed in Thailand Where Half the Path Is Just Wooden Planks on a Cliff - photo 7

    Then comes level six—the one everyone warned me about. About half of this level consists of wooden plank walkways anchored directly into the cliff face. The other half is on solid ground, but obviously you want to be on the cliffside portion.

    This is the highlight. No question. Walking along those planks with the Mekong River basin stretching out below and the green canopy of Bueng Kan rolling in every direction—it was equal parts thrilling and terrifying. The breeze up there made it feel even more real, like I could fall through if I looked down too long.

    Watch your step. There are no railings or safety lines, and one slip would be serious business. But the walkways felt stable and well-maintained, so I pushed forward.
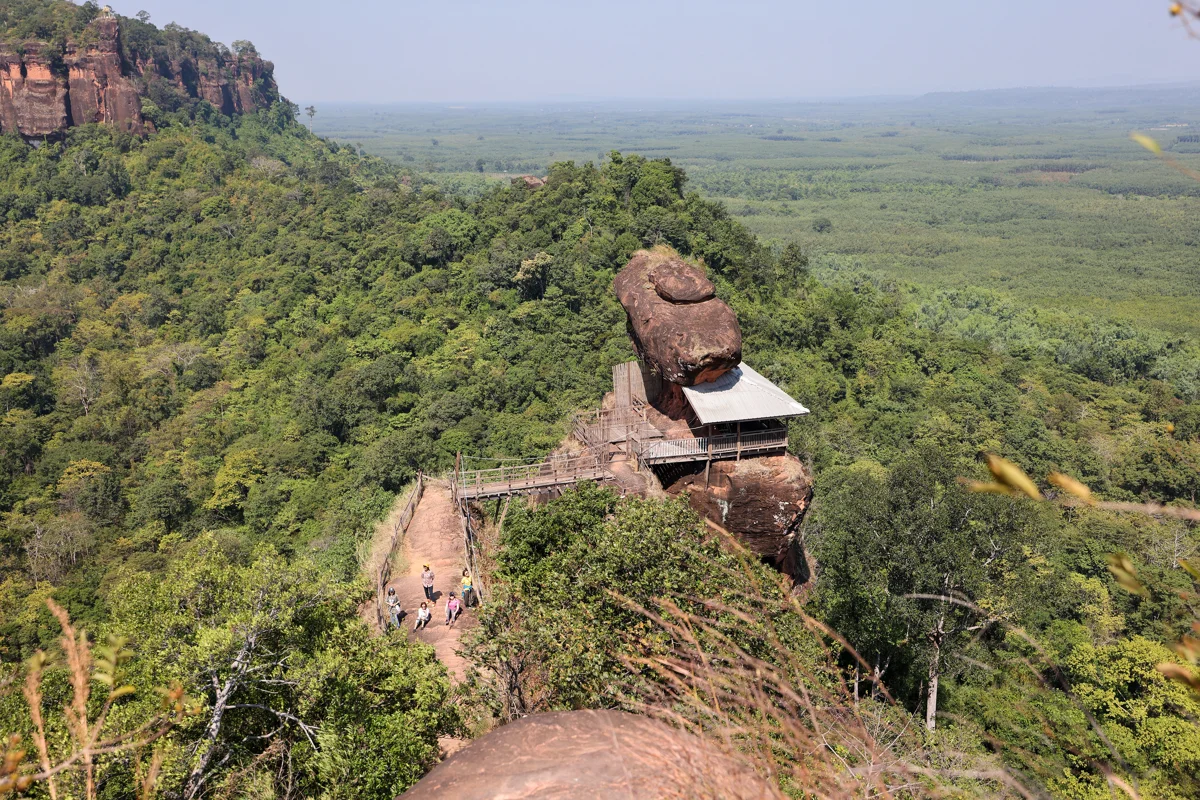
    The Temple I Climbed in Thailand Where Half the Path Is Just Wooden Planks on a Cliff - photo 8

    Level seven is the summit. I’d read that it’s known for venomous snakes and locals say you go up at your own risk. I climbed just out of curiosity—there are no walkways or shrines at the top, just open mountain. The views from the very peak are great if you find the right spot, but honestly level six is what you came for.

    Practical Tips

    • Time needed: Allow about 2 hours at a moderate pace. I stopped constantly for photos and still only took that long.
    • Clothing: Even though it’s essentially a hike, this is an active temple. Wear pants, covered shoulders (a sleeved shirt), and proper shoes—sandals won’t cut it on those stairs.
    • Parking: Plenty of free space at the base if you drive yourself.
    • Safety: There are no guardrails or warning signs along the cliff walkways. Keep your eyes on the path and watch your step, especially on the sixth level.

    If you ever find yourself in Bueng Kan—and I know it’s not the first place that comes to mind when planning a Thailand trip—make Wat Phu Tok your reason. It’s one of those places that stays with you long after you’ve left.


    Keep Reading

  • The Best Sunglasses for Travel, Plus a Few Accessories Worth Packing

    The Best Sunglasses for Travel, Plus a Few Accessories Worth Packing

    I learned this the hard way: your nicest sunglasses are not meant for travel. Early on, I ignored every warning about leaving them at home, dropped my favorites somewhere between a cobblestone street and a taxi trunk, and never saw them again.

    The Best Sunglasses for Travel, Plus a Few Accessories Worth Packing - photo 1

    Now I keep one pair in the car and another exclusively for trips. Over time, a few models have earned a permanent spot in my bag — along with some small accessories that seem minor until you need them.

    The Sunglasses I Actually Pack

    I mix city walking with outdoor days, so versatility matters more to me than brand prestige. Here is what has worked.

    Goodr Sunglasses — Best Budget Option

    These are the pair you do not need to worry about. I had a pair of Goodrs that served perfectly well, and when they eventually disappeared on a trip, it was no great tragedy. There are plenty of models to choose from, but the real benefit is peace of mind: lose them or scratch them and you can move on without stress.

    Ombraz Armless Sunglasses — Editor’s Pick

    I have been using Ombraz sunglasses for years, and they are my go-to for outdoor days. Instead of sidearms, they come with a built-in cord that adjusts to fit around your neck or sit on top of your head. They pack flat, stay secure in wind, and are ideal if you take your glasses on and off frequently — which I do whenever Sam hands me the camera.

    I have both the Dolomite and Classics shapes. If you have a low nose bridge like I do, the Nose Pad Risers make a noticeable difference. They also sell Side Shields, which came in handy at Burning Man when the dust was relentless.

    Pair Eyewear — Most Versatile

    Pair Eyewear works on a simple but clever idea: a base frame with magnets that lets you swap out top frames. The same glasses become prescription eyewear in the morning and sunglasses by afternoon. I appreciate not having to carry two pairs when we travel.

    Maui Jim Polarized Sunglasses

    For traditional-style shades, I prefer Maui Jim. I like the oversized frames that protect the skin around my eyes, but it is really the lenses that matter — they do not just darken everything. The polarization eliminates glare and actually enhances colors, so natural light looks clearer rather than muted.

    Mine makes everything look a little like sunset, which I think is a fair trade for the price.

    Accessories Worth Packing

    A good pair of sunglasses is only as useful as you can keep it protected. These two small additions have saved me more than once.

    The Bristow Lens Jacket — A Slim Glasses Case

    The Best Sunglasses for Travel, Plus a Few Accessories Worth Packing - photo 2

    This slim case was invented by Jacob, a friend of mine, and his college roommate — they raised over $144k on Kickstarter for it. Rather than enclosing the whole frame in a bulky case, the Lens Jacket slips just over the lenses, which are really the part that needs protection. It folds into your bag or pocket without adding weight.

    The exterior is supple sheepskin leather and the interior has a soft fuzzy liner. I was told a bomber jacket inspired the design, and honestly, it makes sense.

    A Glasses Chain

    I saw a friend wearing one of these and immediately knew I needed one. Paired with the Lens Jacket, my glasses look like they come with their own tiny purse, which I think is rather charming. It also means I can take them on and off without hunting for a safe place to set them down — helpful when you are moving through airports or trying to snap photos.

    My only note: the chain does tangle if it gets bunched up at the bottom of my bag alongside keys and cards. I am considering trying a stone-beaded version next time, which seems less prone to knots.

    A Few Final Thoughts

    The right sunglasses for travel do not have to be your most expensive pair — they just need to fit how you actually move through a day. A cord that keeps them from slipping off, lenses that handle glare without washing out the world, and a slim case that does not take over your bag: those are the details worth getting right.

    What about you? Do you have a travel pair of sunglasses that has survived every trip, or are you still looking for one?

    Keep Reading

  • 7 Lessons I Learned After Traveling with My Daughter for 5 Years

    7 Lessons I Learned After Traveling with My Daughter for 5 Years

    This August marks five years since I became a mom. My life has changed in ways I never expected — I no longer have the freedom to book spontaneous long trips on my own — but somehow I’ve kept travel woven into our days. And into mine.

    At just five years old, my daughter has been to 25 countries with me.

    I’ve never cared much for counting countries — I don’t even track how many places I’ve visited myself — so this isn’t about the numbers. It’s about raising a child who is genuinely curious about the world, and what five years of traveling together has taught me along the way.

    From long weekend getaways around Europe to multi-week road trips across the Americas, I can say without hesitation that traveling with your child is one of the best things you’ll ever do.

    1. We’ll Wait Until They’re Older So They Can Remember — But You Don’t Have To

    She’s too young for that trip. Why not wait a few more years so she can remember?

    I used to hear those words all the time, and I think they miss the point entirely.

    My answer is always the same: we’ll go now, and when she’s older, we’ll go somewhere else. The world is huge. You will never visit every country or region properly — it simply isn’t possible. So if you’ve been dreaming about a destination and finally have the time and money to make it happen, don’t postpone it. Just go.

    People say children won’t remember those early trips. Maybe they won’t recall every detail, but travel becomes a natural part of their life. They grow up seeing the photos, hearing the stories, and most importantly — you will remember.

    Not every country is suited for young kids — Central African Republic or Afghanistan come to mind — but there’s no perfect age to travel. There are only different ways of experiencing the world.

    7 Lessons I Learned After Traveling with My Daughter for 5 Years - photo 1

    2. Kids Understand More Than You Think

    If you meet us on a trip, try asking my daughter to name the smallest country in the world (Nauru), identify the only Dutch-speaking country in South America (Suriname), or find Yemen on a map.

    You might be surprised.

    She isn’t smarter than other children. I just think travel has had such a big impact on her — it made her genuinely curious about the world and eager to explore it.

    7 Lessons I Learned After Traveling with My Daughter for 5 Years - photo 2

    We spend hours looking at maps together and reading books about characters who travel. One of her favorites follows a penguin who leaves Antarctica on the back of an albatross, visiting Peru, South Africa and New Zealand along the way.

    She already suggests countries she wants to visit. Whenever we leave home, I make sure she knows where we’re going and what to expect from the journey. Children are like sponges — they absorb knowledge and experiences at a pace that surprises you.

    The earlier you start, the better. The longer you wait, the less interested they become in their parents’ world. Take your chance while you’re still their hero.

    3. One Day You’ll Have to Tell Them: Start Over

    An unavoidable consequence of traveling with kids is that country numbers come up. Kids can easily become obsessed with them — my daughter mentions ours a bit too often, sometimes even bragging about it.

    7 Lessons I Learned After Traveling with My Daughter for 5 Years - photo 3

    I think it’s important to teach them what travel is really about: meaningful experiences, local encounters and curiosity, rather than statistics. If they decide to become country counters as adults, that’s their choice. But the countries visited as children don’t count — not because they don’t remember them, but because traveling as an adult means making your own decisions, planning your own itineraries, and experiencing places in your own way.

    One day I’ll sit my daughter down and say: Dude, you need to start over.

    4. Find a Balance Between Kid-Friendly and Local

    This is the real challenge — and honestly, it’s a fun one.

    If you want travel to grow on your child, you need activities that are enjoyable for them but local enough that they feel somewhere genuinely different. In practical terms: fewer playgrounds, fewer theme-park trips.

    7 Lessons I Learned After Traveling with My Daughter for 5 Years - photo 4

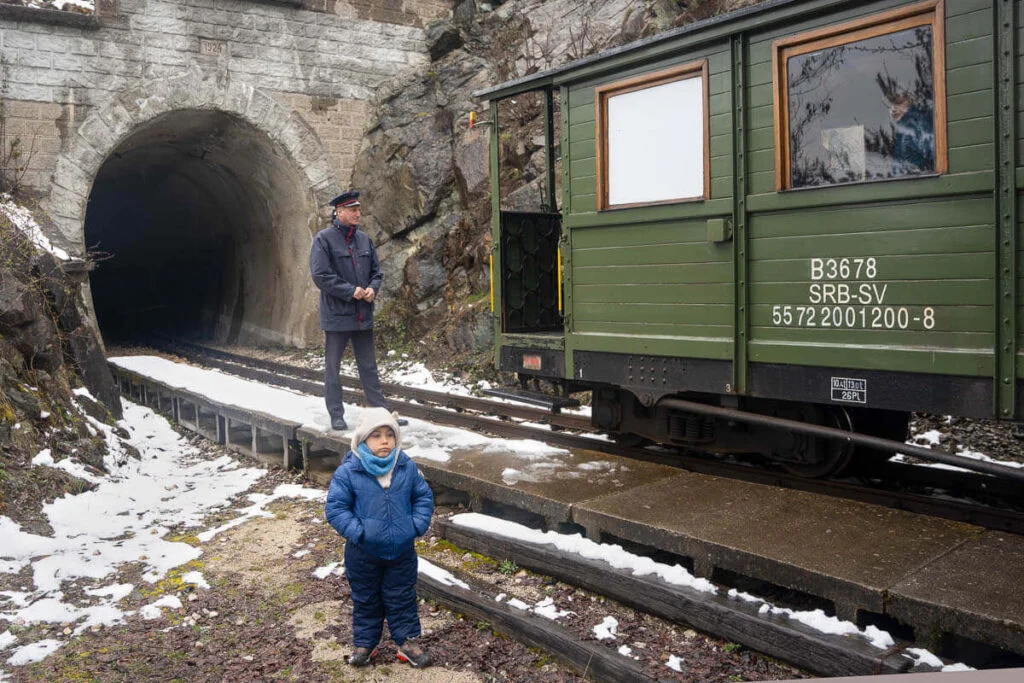
    Our recent trip to Serbia is a good example. We went because, besides San Marino, it was the only country I hadn’t visited in mainland Europe — very selfish, I know. It was just the two of us for a week.

    We spent two nights in Belgrade walking around, eating ice cream and trying local restaurants with foods she’d never seen before. No boring museums, no excessive walking. Then three nights on two different farms in rural Serbia where she could feed the animals. The owners spoke only Serbian, everything felt wonderfully unfamiliar, and the food was deeply local. Finally, two nights in a traditional wooden hut in the mountains, from where we took the Šargan Eight train.

    Everything was very Serbian. Everything was also thoroughly fun for a four-year-old.

    5. Traveling with Kids Doesn’t Mean Missing Out

    There’s a common misconception that traveling with children means missing out on things. I think the whole idea depends entirely on your expectations.

    If I travel to Tanzania with my daughter, it’s natural that I won’t be climbing Kilimanjaro or overlanding by matatu all the way to Burundi. But I’m not missing out — I already know that’s not the kind of trip we’re taking. And if I want to climb Kilimanjaro, I can always come back another time on my own.

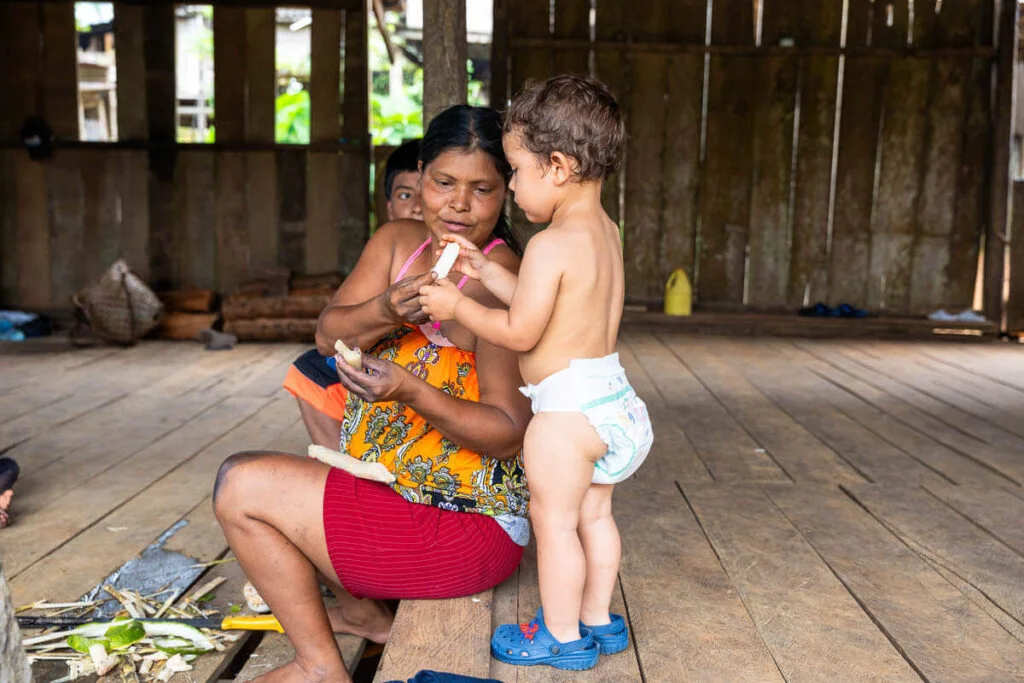
    When we went to Ecuador, climbing Chimborazo was never part of the plan. Instead, we spent three days on a local farm in a tiny village nearby. The locals embraced us and made us feel like part of their community — probably because we were a family. I wouldn’t have stayed on that farm if I’d been traveling alone.

    If I want to do something wild — hitchhike across Afghanistan, spend four days overlanding to Kaieteur Falls in Guyana — I’ll do it solo or with friends.

    Stop saying traveling with kids means missing out. You may see fewer things, but you slow down, spend more time in places, and often have far more genuine interactions with locals than you would on your own. Each travel style has its own advantages and beautiful moments.

    6. Family Travel Is Easy — Single Parenting Is a Different Game

    Traveling as a family is actually much easier than people make it sound. What’s difficult is traveling alone with a child. That’s an entirely different league.

    My daughter’s father and I separated some time ago, but I’m fortunate that her grandmother has always supported the idea of my daughter growing up on the road — so I can still take these several-week trips by myself.

    Still, whenever I travel alone with her, I remember how much easier things are when there are two adults. Late at night in a hotel room, it’s snowing outside, and she says she’s thirsty. You realize you forgot to buy bottled water and she’s already in pajamas. With two parents, one runs downstairs while the other stays behind. Alone? It gets complicated.

    Multiply that by every meal, every bathroom break, every train ride, every time she gets sick, and the countless tantrums on the street while you carry all the bags yourself. There are moments when I wonder: What am I doing here?

    All the good moments make up for it.

    7. Children Adapt to Everything — Adults Complain More

    I’ve spent years bringing travelers from all kinds of backgrounds to some pretty unusual places, and after taking my daughter on multi-country road trips, long bus journeys, campervan adventures and even jungle regions in the Pacific, I can say this: some adults are certainly more dramatic and demanding than most children.

    Children adapt to almost everything. They won’t complain about poor accommodation or limited food options as long as they’re having fun with you.

    Remember that wherever you travel, there will always be children. There will always be diapers and there will always be food for kids. The world is built for them too.

    A Final Thought

    Having a daughter who loves traveling doesn’t make us special or better than anyone else. I simply believe that, like any other passion or hobby, children often end up embracing what their parents genuinely love.

    This isn’t meant to tell parents how they should raise their kids, or suggest everyone should travel the way we do. But if you’re passionate about traveling and have been postponing trips because you think having children means the end of your adventures — I hope these reflections encourage you to simply go.

    Because the thing I’ve learned most over these five years is that children don’t stop us from traveling. They just change how we do it — and in a way, for the better.

    A note from Nora: Sam tells me I should write about travel more often. He says the kitchen gets quiet when I’m gone, but he’s wrong — Biscuit keeps him company, and our daughter sends photos from every hotel room. Small rituals, even on the road, make everywhere feel like home.

    Keep Reading

  • The Ceviche That Made Us Book a Trip to Lima — Chez Wong and Chef Javier Wong

    The Ceviche That Made Us Book a Trip to Lima — Chez Wong and Chef Javier Wong

    There are restaurants so good that you plan an entire trip around them. I used to think that was something people said about French bistros or Tokyo counters. Then a friend set up lunch for me at Chez Wong in Lima, and I realized she wasn’t exaggerating when she called it once-in-a-lifetime.

    The place is unassuming from the outside — just a teal wall, a metal gate, parked cars. Nothing on that street corner tells you what waits behind it.

    The Ceviche That Made Us Book a Trip to Lima — Chez Wong and Chef Javier Wong - photo 1

    A man of few words and a very sharp knife

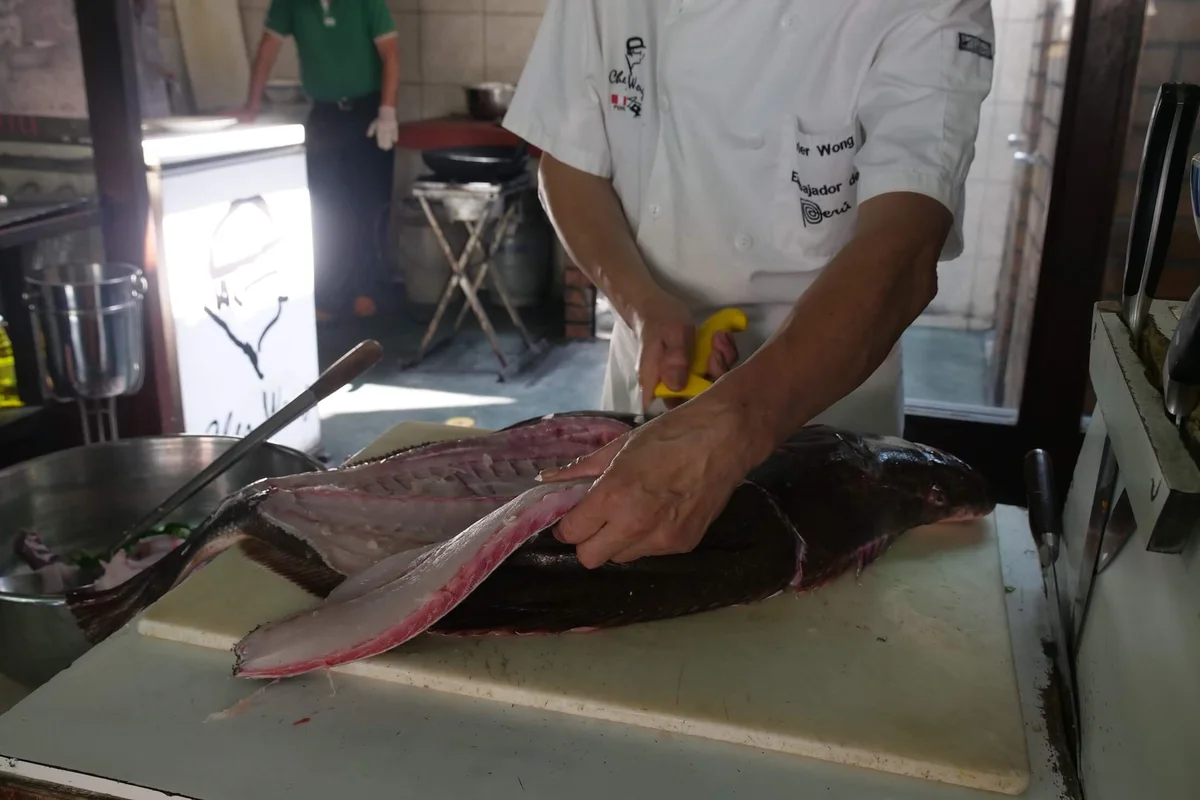
    Javier Wong is the chef, the owner, and honestly the whole reason this place exists. He’s older now, but he moves quickly and with total confidence — no wasted gestures, nothing uncertain about him. Watching him lean down and lift a 10 kg (22 lb) Dover Sole from an ice tray with one hand tells you everything.

    He works right in front of you for nearly an hour before serving a single plate. And that is both thrilling and slightly cruel, because the smells alone could ruin your appetite if you weren’t already committed to the experience.

    The Ceviche That Made Us Book a Trip to Lima — Chez Wong and Chef Javier Wong - photo 2

    Five ingredients. That’s all it takes.

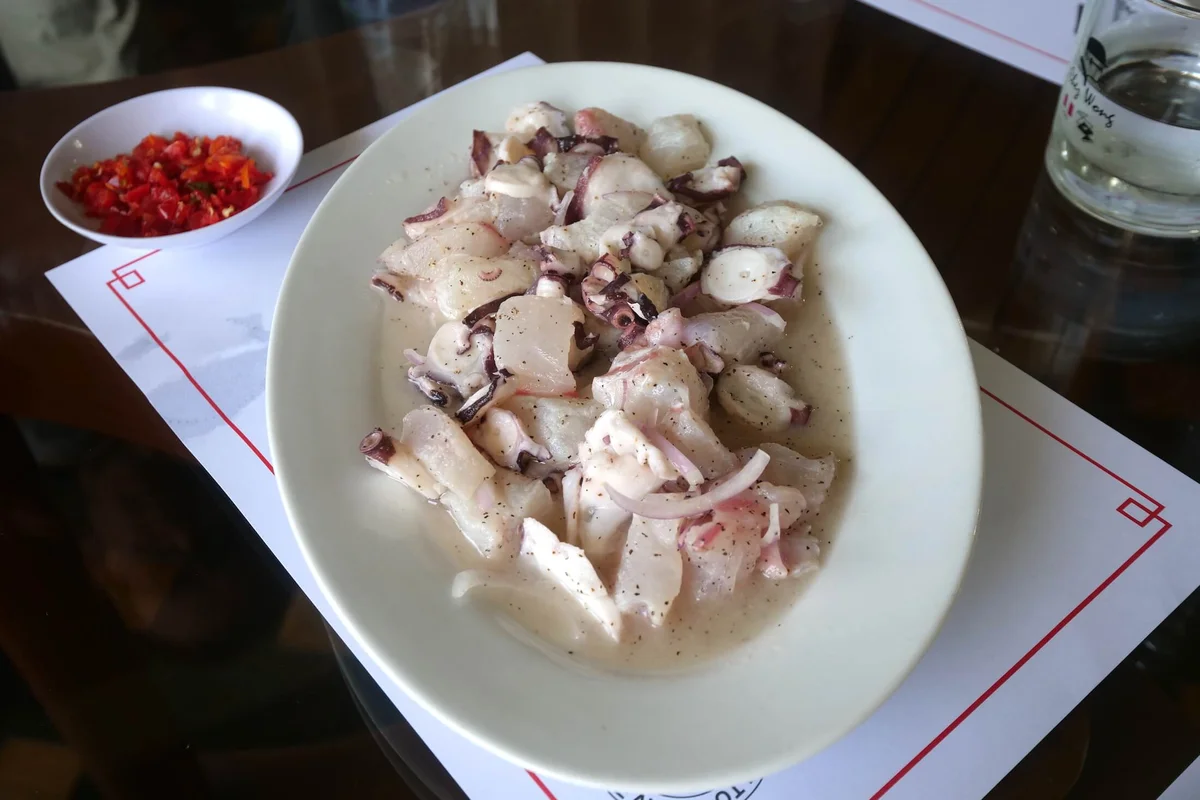
    The first course is ceviche, and what surprised me most was how few things Chef Wong actually uses. Dover Sole fillets cut into generous chunks — not the thin slices you’d get at a street stall — pieces of fresh octopus, lime juice (a lot of it), salt, and just a tiny bit of black pepper.

    Five ingredients. Nothing more than that.

    The Ceviche That Made Us Book a Trip to Lima — Chez Wong and Chef Javier Wong - photo 3

    The simplicity is the point. He lets the quality of each one speak for itself. The fish melts on your tongue; the octopus has this clean, bouncy chew. And the lime juice doesn’t just marinate — it actually changes the texture of the meat, turning those translucent raw edges opaque and bright.

    He keeps about a dozen small dishes of Peruvian Aji peppers around his station, each one paired with a plate. You build your own heat level.

    You don’t order anything here

    There is no menu. You order drinks and sit down. Chef Wong decides what he makes each day, who gets served first, how many courses there are, even the portion sizes. The dining room holds only eight tables, and during our lunch, we simply let him guide us.

    This is why reservations matter so much — he buys exactly the fish he needs for each confirmed party that morning at the market. No extras, no leftovers. We saw a group turned away because they didn’t have one. It’s not unfriendliness; it’s just how the system works.

    The tiger’s milk

    All that lime juice pooling at the bottom of your plate? You drink it. Some places in Peru serve it as a cocktail on its own — they call it leche de tigre, or “tiger’s milk.” At Chez Wong, you just ask and someone brings you a glass.

    I can’t describe it except to say: intense. Sour, meaty, salty, peppery — all amplified beyond what your tongue expects from juice that was marinating fish. It hits hard for a moment, then settles into something almost creamy. The consistency is thick and milky in the best way.

    Fire and tangerine

    The second course completely changes pace. Chef Wong steps behind his wok and what follows looks less like cooking and more like controlled explosions. Flames whoosh to the ceiling — one after another, in rhythm, just using one hand. Everyone else in the room takes a step back. He doesn’t even flinch.

    Here’s the thing that stuck with me: he holds a large metal spoon the whole time but doesn’t actually touch the ingredients until the burner is off. The fish is so delicate that stirring it would ruin those perfect cubes. All he does is let the fire do its work, then ladles everything onto your plate.

    The stir-fry itself was surprisingly simple too — fish, snow peas, chard, bok choy, thick mushrooms, and a ripe tangerine cut into chunks. He throws them all in at once instead of staging them, trusting his years of experience to get the timing right. Soy sauce, but barely — just enough for color.

    The tangerine was the masterful move. Soft citrus flesh alongside chewy mushrooms and crisp chard stalks. Every texture had a job. Every flavor was obvious; nothing was hiding behind anything else.

    How to eat at Chez Wong

    If you’re planning a trip to Lima, here’s what I learned about making it work:

    • Reservations are not optional. The waiting list can be weeks or even months long. Book as early as possible.
    • Hours: Tuesday through Saturday, 1:00 pm to 3:30 pm. Closed Sunday and Monday.
    • Pricing: Our party of four came to 545 Nuevo Soles total (about US$165). That covers both courses with drinks for everyone.
    • Arrive on time. He starts at one, and the whole experience unfolds from there.

    I still think about that lunch sometimes. Not just because the food was extraordinary — though it absolutely was — but because of what watching Javier Wong cook felt like: proof that a lifetime spent doing one thing well turns into something almost quiet in its beauty.

    Maybe that is the real gift of seeking out meals like this. They don’t just feed you. They remind you why you travel in the first place.

    Keep Reading

  • Things to Know Before Visiting Tulum

    Things to Know Before Visiting Tulum

    I’ve been thinking a lot about Mexico lately — specifically Tulum. I visited for the first time five years ago, and the place has shifted so much since then that it felt worth sitting down with and sorting out. If you are planning a trip, here is what you need to know.

    How to Get to Tulum

    You cannot fly directly into Tulum. The closest airport is Cancun, which sits about two hours away from town. Once you land there, you have three main options for the ride over:

    Private or group shuttle. Book ahead of time and avoid the scramble outside the terminal. I usually prefer this one because it feels safer than hailing a random taxi when you’ve just stepped off a plane.

    Taxi. The most expensive option by far. Expect to pay between $60 and $100 for the trip to Tulum. You can try negotiating, but $100 is what it usually comes down to.

    ADO bus. Your cheapest bet at about $10 per ride. There’s an ADO kiosk right in the airport near the rental car counters, or you can buy a ticket outside by the bus stop. I’ve ridden ADO buses across Mexico for years — they are clean and completely safe.

    Rental car. If you want flexibility to explore Tulum and nearby towns, a rental car works well. Book directly through the company website (Hertz, Avis) rather than third-party sites like Expedia or Skyscanner during high season.

    How to Exchange Money

    Around Tulum you can pay in US dollars at many places, but pesos will save you money. Skip the currency exchange kiosks in the airport — you get a better rate withdrawing from a local ATM once you arrive in Mexico. The ATMs in Tulum Centro (the pueblo) tend to be more reliable than the ones in the hotel zone, which sometimes run out of cash.

    Keep some bills on hand for taxi rides, taco stands, and tips. Local businesses will charge you more if you pay in dollars instead of pesos, so it is worth making the switch.

    Where to Stay in Tulum

    Tulum really has two sides: the hotel zone and Tulum Centro.

    The hotel zone is full of villas, treehouses, and boutique hotels with direct beach access. It is expensive, but you get that sand-right-outside-your-door feeling. Many places skip air conditioning during the day, and internet can be spotty — you’ll rely on hotel and restaurant wifi to stay connected.

    Tulum Centro is more affordable, about a 10- to 15-minute drive from the beach. This is where locals live, so the vibe feels more authentic and grounded.

    Aldea Zama sits between the two — roughly a five-minute drive from the beach. It’s a newer development with plenty of Airbnbs, which work well for large groups.

    Tulum Is Not a Resort Town

    Unlike Cancun, Tulum is not built around big resorts. The original draw was always that laid-back, bohemian atmosphere — bungalows and boutique hotels with an easy rhythm to them. There is one actual resort in town: Kore Tulum. Beyond that, Dreams Tulum sits 20 to 30 minutes outside the city. Just know that staying outside of town means paying $50 to $100 each way back into the ruins, beach, and hotel zone.

    Things to Know Before Visiting Tulum - photo 1

    What to Pack

    Leave your heels at home. The hotel zone is essentially one long, rocky dirt road, and you do not want to twist an ankle or snap a heel in that soft ground — I have seen it happen.

    The style here is beachy and bohemian. Pack bikinis, loose clothing for daytime, a couple of nice dresses for evening bars, and comfortable sandals. The heat and humidity run at full force — not unlike Houston on a summer day — so sunscreen is non-negotiable. Bring bug spray too; the mosquitoes in Tulum are relentless.

    If you need to pick something up while there, Super-Aki (the local supermarket) has most everything, along with pharmacies around town. No prescription needed for basic medications.

    How to Get Around

    Decide before you go whether you want a rental car or not. Without one, taxi costs add up fast — every trip to the beach or a hotel-zone restaurant is another fare. Traffic can get pretty bad at night and during holidays, so expect higher prices or waits of up to an hour.

    Where to Eat

    Tulum will let you eat your heart out, but book ahead — especially if you are visiting on a weekend. I recommend using the OpenTable app or calling the restaurant directly to reserve a table at the popular spots in the hotel zone.

    When to Go Sightseeing

    For ruins and cenotes, arrive close to opening or closing time for some peace away from the tour crowds. You can book through Viator or Airbnb Experiences, but paying directly at the door is usually cheaper than going with a guided group.

    Tulum Is Not Cheap

    You can do Tulum on a budget, but hotel-zone prices rival New York and Las Vegas. If your plan involves boutique lodging, craft cocktails, and Instagram-worthy beach clubs, be prepared to spend.

    How to Do Tulum on a Budget

    Tulum rewards planning ahead. Here is how I keep costs down:

    • Stay at an Airbnb or hostel in Tulum Centro for less than $30 a night.
    • Bike or take the collective bus to the beach for under $10 a day.
    • Eat local street food — many plates run under $5.
    • Use the ADO bus to get to and from Tulum for less than $10 each way.
    • If you travel with a group, split an Airbnb in Centro for under $50 per person per night.

    Tulum Has Changed

    I visited Tulum for the first time five years ago and I will be the first to tell you that it is not the quiet, unknown beach destination it once was. There’s a Starbucks now. The traffic is real. High season gets extremely busy.

    Despite all its growth, I still love this place. If you go in with realistic expectations, Tulum can absolutely be one of those trips where everything clicks — even if the Wi-Fi at your hotel zone bungalow disappears after breakfast.

    Keep Reading

  • Fish Head Curry at Tugu View Cafe: A Malaysian Lunch Worth the Trip

    Fish Head Curry at Tugu View Cafe: A Malaysian Lunch Worth the Trip

    I have a theory that Malaysia might just hold the most interesting lunch counter on Earth. Between centuries of Indian and Chinese cooking traditions and the incredible variety of local ingredients, every street corner seems to offer something worth stopping for.

    But one dish always pulls me in: fish head curry. It is messy, deeply spiced, and somehow at once comforting and adventurous — everything I want from a great meal.

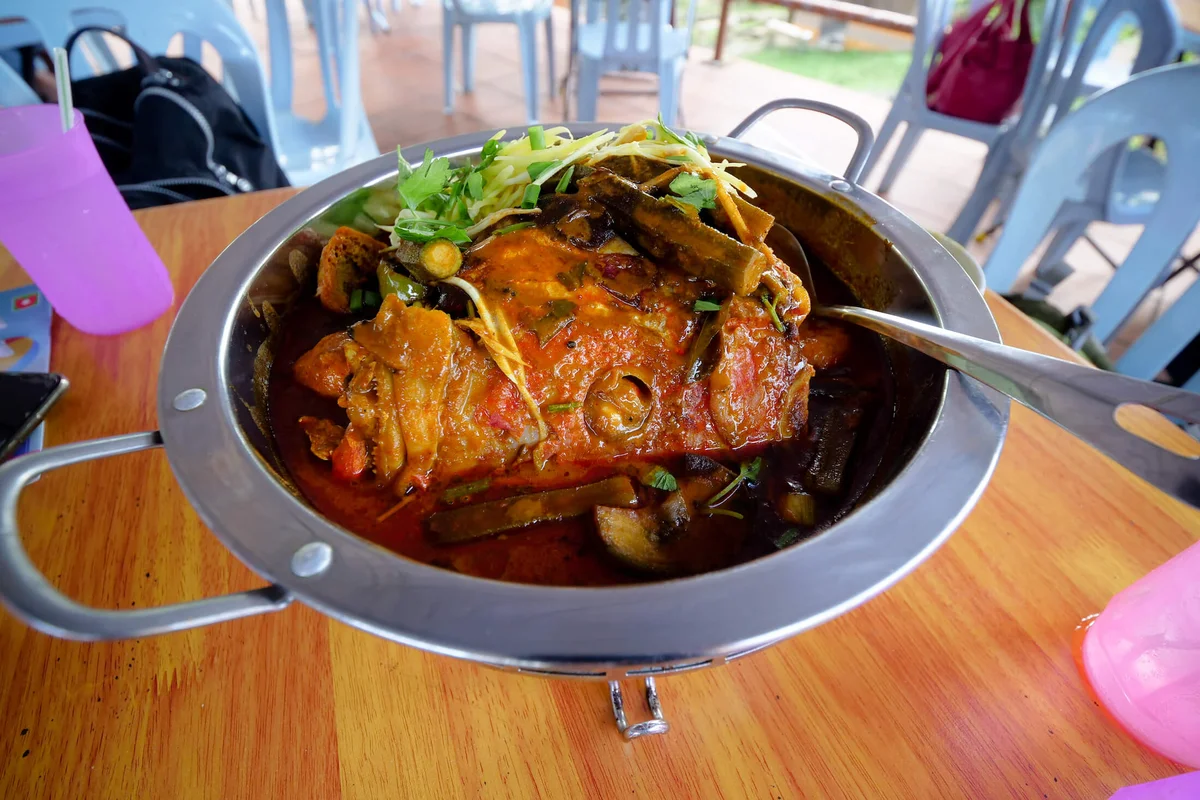
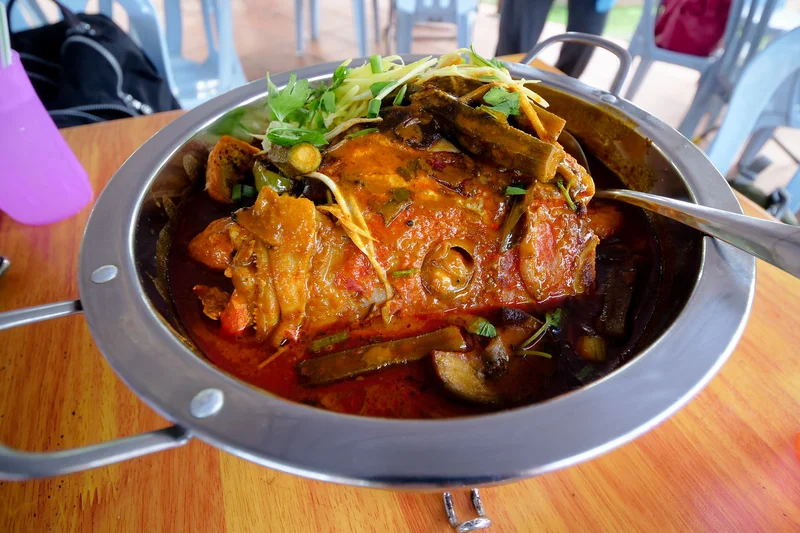
    Whole fish curry in metal pot on wooden table

    The nasi campur lunch counter

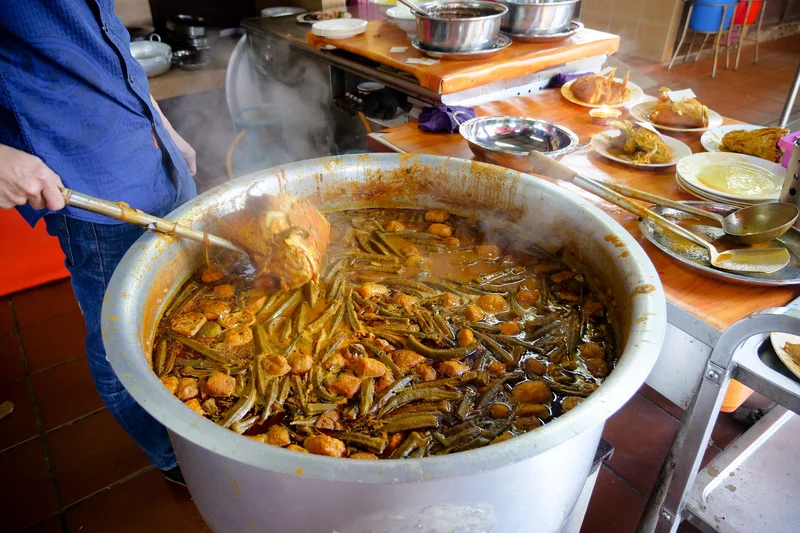
    Tugu View Cafe in Kuala Lumpur runs what Malaysians call nasi campur — mixed dishes served over rice. It is the ultimate lunchtime format across South East Asia, and for good reason.

    You build your plate from creamy curries, meaty soups, whole fish, and piles of fresh and steamed vegetables. There is never enough room on the plate for everything you want to try. Eating like a local means ladling extra curry sauce over the rice before anything else touches it. When you eat with your fingers, that move makes all the difference.

    It is genuinely delightful when a restaurant does this format well and also has its own signature dish to boot.

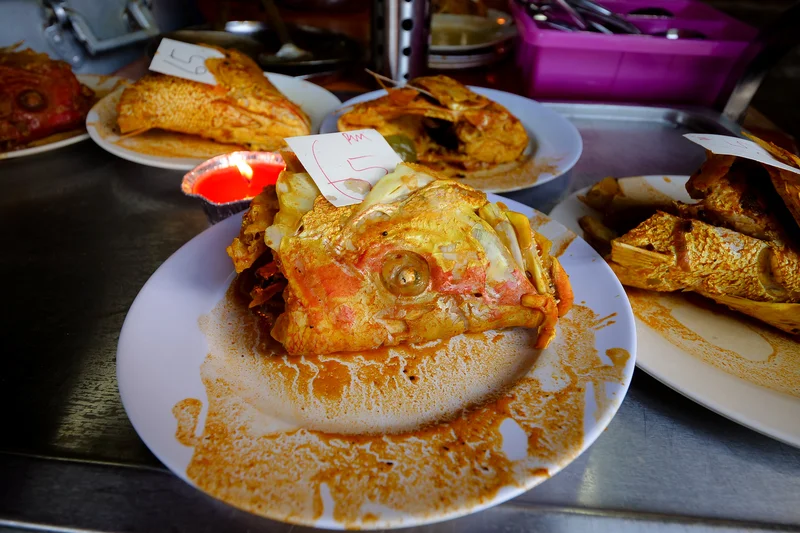
    Cooked fish heads plated with RM 5 price tags

    Why fish head curry?

    The fish heads here come from Red Snapper — Ikan Merah in Malay. It is an ocean fish, and the large meat-filled skull makes it a perfect candidate for slow-cooked curry.

    Steaming curry pot being served at lunch counter

    Think about it: cheeks, eyes, all that tender meat tucked into the head. Pulling soft morsels out of the bone is half the joy of eating this dish. Any fan of fish head curry will tell you the most flavorful bites are always inside the head itself.

    Tugu View Cafe in Kuala Lumpur

    The city has plenty of restaurants serving enormous plates of fish head curry. But Tugu View Cafe stands out — it is genuinely one of the best places to go for this dish (you can see Mark Wiens’ full review in his video).

    Whole Red Snapper in orange-red curry sauce close-up

    On one particularly joyful day in Kuala Lumpur, I ate three different fish head curries back to back. Each one tasted completely different from the last, and that variety alone is worth a trip to the city.

    A practical note on finding the place

    The cafe gets its name from the Tugu Monument, which sits slightly farther down the same hill. It is a well-known Kuala Lumpur landmark — our local friends all visit at some point, though curiously not every taxi driver seems to know it.

    There is a nearby park with a large flower garden and walking areas around the monument itself. The Tugu was built to commemorate Malaysian soldiers during the fight for independence. It feels right that such a glorious dish exists within walking distance of it.

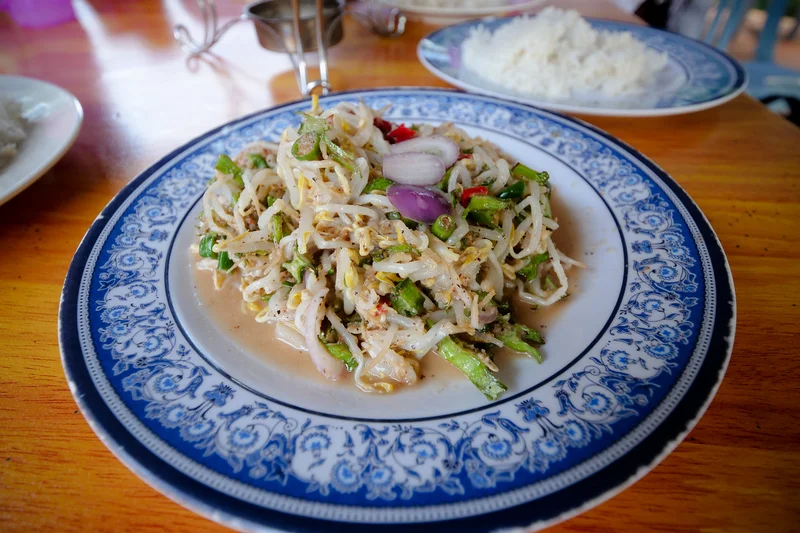
    Thai-style salad on ornate blue-and-white plate with rice

    One heads-up: if you walk over from the gardens, the entrance is not immediately obvious. The closest way in is up several flights of stairs, past a small shop selling ice cream and frozen durian. It looks like the shop blocks the stairs, but it does not — it is just trying to sell treats to tour bus passengers.

    Tugu View Cafe at a glance

    • Name: Tugu View Cafe
    • Location: Google Maps (near the Tugu Monument, Kuala Lumpur)
    • Hours: 7am – 6pm (closed Sunday)
    • Price: Our entire meal came to 144RM (about US$35). A smaller fish head at half that price would be enough for two or three people.

    A plate of Malaysian food has this remarkable ability to both excite and settle you at the same time. The culture is wonderfully laid back, and the food is richly layered without trying too hard. It is almost magical how well it all fits together.

    Tugu View Cafe has a friendly staff and an atmosphere that makes spending an afternoon there feel easy. If you find yourself in Kuala Lumpur, I would say this is one of those meals you should build a day around.


    A note from Nora: The first time I tried fish head curry, I was intimidated by the size of it. Sam laughed and told me to just start at the cheek — and he was right. That bite changed everything. If there is one rule for eating this dish, it is: do not be afraid of the head.

    Keep Reading

  • 48 Hours in Amelia Island: A Florida Weekend You Actually Need

    48 Hours in Amelia Island: A Florida Weekend You Actually Need

    I was sitting at the kitchen counter on a Wednesday morning, staring at a calendar that looked like someone had thrown confetti at it. Between Sam’s work trips and our daughter’s activities, we hadn’t taken a proper weekend together in months. Then I saw this email from the Amelia Island tourism board — would we like to visit? — and before I could overthink it (which I absolutely do), I said yes.

    Honestly, I’d never even heard of Amelia Island until then. If you’re anything like me, your Florida travels probably max out at Orlando or Miami. But this little island up in the northern part of the state turned out to be exactly what we needed.

    Where Exactly Is Amelia Island?

    Amelia Island sits in northern Florida, named after Princess Amelia of England. It’s about a 40-minute drive from Jacksonville — which, fun fact, was named after President Andrew Jackson. The island has 13 miles of beaches, sand dunes, and a kind of unhurried energy that makes you forget about the week you just left behind.

    Getting there is easier than it sounds. If you’re on the East Coast, it’s roughly a two-hour flight from New York City. Prefer to drive? It’s about 2.5 hours from Savannah, Georgia — scenic enough that you’ll want to play good music and sing badly.

    48 Hours in Amelia Island: A Florida Weekend You Actually Need - photo 2

    What We Did in Amelia Island

    We had three days, which felt like the right amount of time. Not rushed, not dragging. Here’s how we spent it:

    Horseback riding on the beach

    This was the highlight for me, and I don’t say that lightly. We booked an hour-long guided ride through Kelly Seahorse Ranch ($95 per person). Riding along the water with those turquoise waves rolling in — Biscuit would have loved this, if only he could swim far enough to make it worth his while. The views made every dollar feel earned.

    Kayaking through the marsh

    Our resort, the Omni Amelia Island Resort, offers kayak and stand-up paddleboard tours of the nearby marsh. Rentals run about $35 per person for a couple of hours. I expected to be flipping over within ten minutes, but the water was so calm it ended up being one of those quiet moments you didn’t know you needed until you were in it.

    Just… sitting on the beach

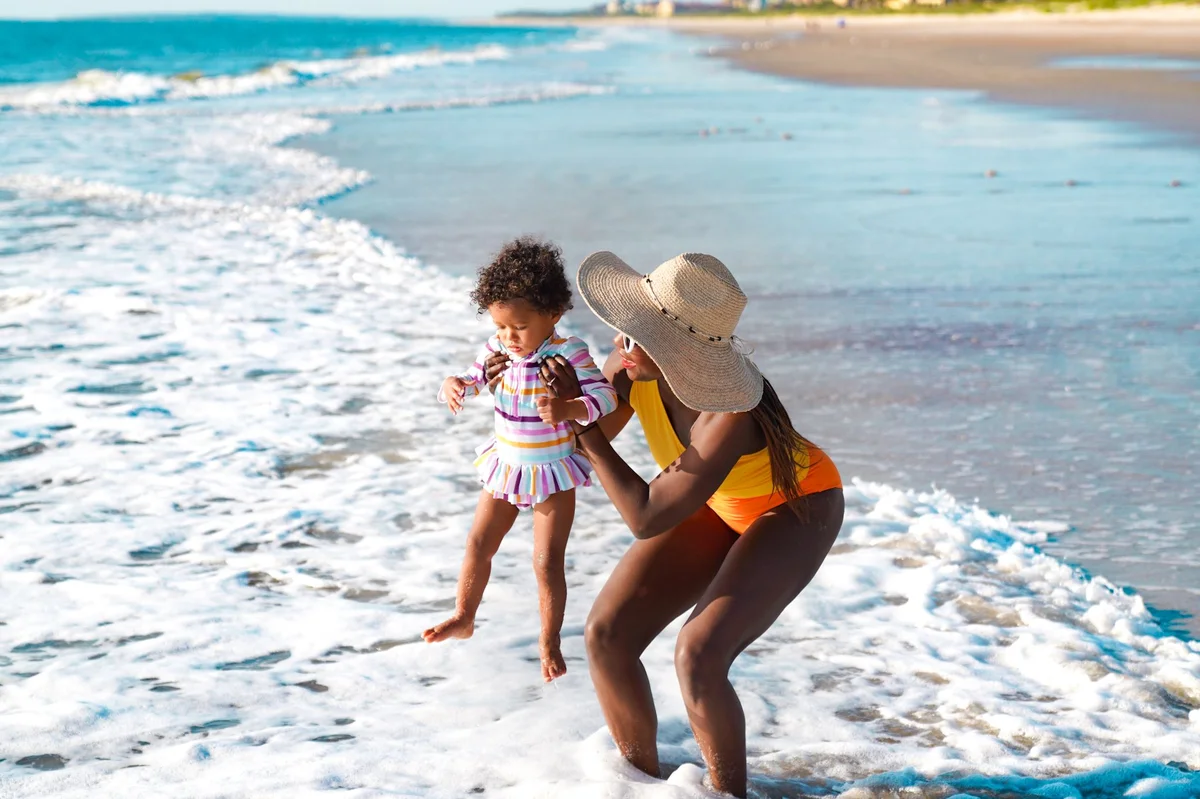
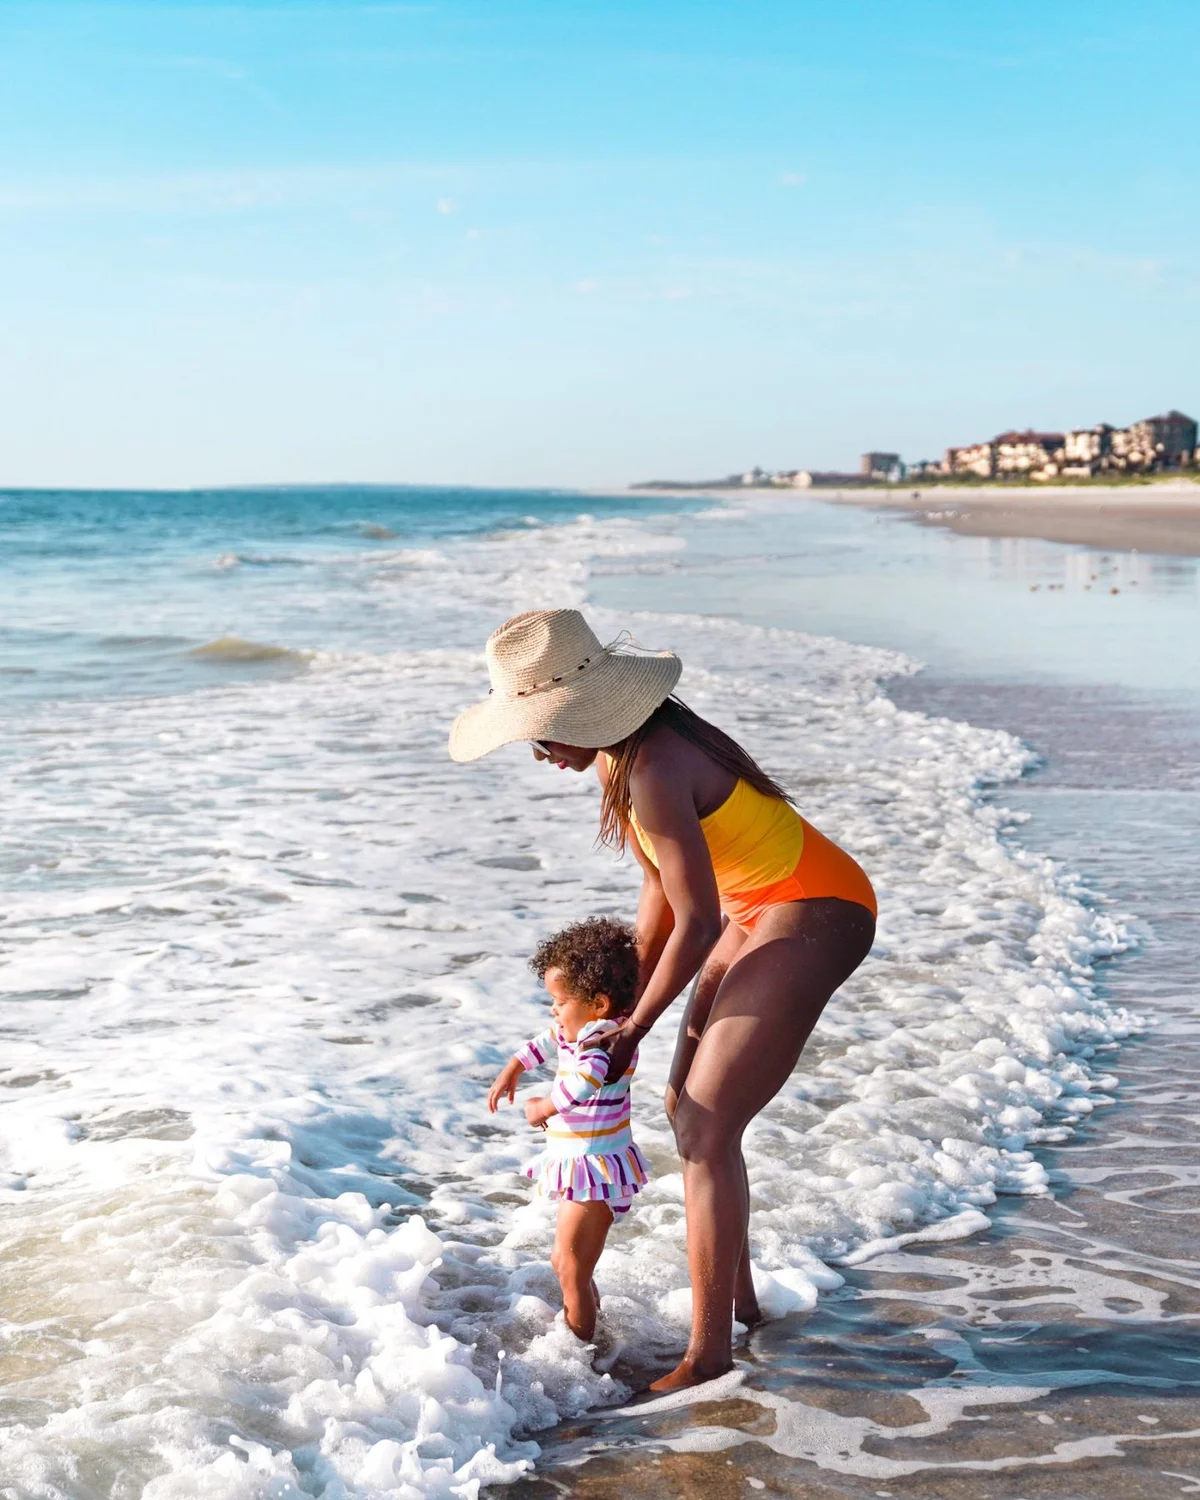
    Sounds simple, right? But with 13 miles of shoreline and waves that are gentle enough for little ones to splash without drama, this was the easiest decision we made all trip. The sand is soft — perfect for castles if your child is into that sort of thing. Ours is more into digging furrows and throwing sand at anyone within range.

    48 Hours in Amelia Island: A Florida Weekend You Actually Need - photo 1

    Downtown Amelia Island

    Center Street in downtown is the kind of place where you slow down without trying to. Quaint shops, photogenic corners, excellent boutique stores — it’s about a 20-minute drive from most resorts. The Museum of History nearby is small but full of interactive displays that kept our daughter engaged, which says something.

    A spa moment at the Ritz-Carlton

    I had been carrying around a lot of mental noise before this trip — balancing work, keeping up with school schedules, the usual. So I booked the Ocean Healing Massage at the Ritz-Carlton ($185). It’s a 30-minute therapeutic bath followed by sea salt exfoliation and warm salt stones. By the time I walked out, my shoulders had finally remembered what relaxation felt like.

    Where to Eat

    Amelia Island has no shortage of good food — which is a relief because Sam and I believe half the joy of travel is eating somewhere new at least once a day. Here are the spots that stood out:

    Timoti’s Seafood Shak. This was our favorite dinner spot on the whole trip. The menu runs from clam chowder to lobster rolls, and there are solid non-seafood options too. Dishes run $15–$25 each. There’s patio seating and an attached playground, which meant Sam could actually finish his meal while our daughter entertained herself.

    Kitchen 251. Located at the Amelia Island Marina, this casual spot served Cajun fare with portions big enough to share — or take home for breakfast the next morning. Entrees around $15–$20. Sam declared it his favorite of the trip, which I respect because he has strong opinions about food and is usually right.

    Lagniappe. Southern cuisine with a French Creole twist — think gumbo, seafood étouffée, the kind of comfort food that makes you want to linger over coffee. Lunch specials start around $18.

    48 Hours in Amelia Island: A Florida Weekend You Actually Need - photo 3

    Coquina at the Ritz-Carlton. Tapas-style dining with beach views that are hard to compete with. Expect to spend more here — tapas range from $14–$26 per plate — but it’s worth it for a special evening meal.

    Espana. Spanish and Portuguese cuisine on a patio so pretty I almost didn’t want to leave the table. The grilled seafood was excellent, and dinner for two with drinks came in around $80–$100. We’d go back just for that patio alone.

    Where to Stay

    We stayed at the Omni Amelia Island Resort, and I’m glad we did. It’s spread across 1,350 acres of nature — golf courses, trails, pools — so there’s never a dull moment if you don’t want one. Rooms start around $300–$500 per night depending on season.

    The splash pad was the real star for our daughter. Since she can’t quite swim yet, having a water feature she could enjoy while we kept an eye on her from a nearby cabana felt like the resort read my mind. I’m making a quiet note to look for hotels with splash pads going forward — it might become a non-negotiable.

    A Few Things to Keep in Mind

    Amelia Island isn’t trying to be Miami or The Keys, and that’s the point. It’s quieter, more low-key, better suited for people who want to actually rest on vacation rather than pack every hour with activities. Bring sunscreen, comfortable walking shoes, and maybe one outfit fancy enough for Coquina.

    Budget-wise, a weekend here is doable without breaking the bank if you pick your splurges carefully. Horseback riding and the Ritz-Carlton spa are worth treating yourself to. For everyday meals, Timoti’s and Kitchen 251 keep things grounded. The Omni is pricier than a motel but felt every bit worth it for what we got.

    The Takeaway

    Florida has so much more to offer than the big-name destinations — and Amelia Island proved that to us in just two days. There’s something about a place this unhurried, with good food and soft sand and enough space to breathe, that settles you back into yourself.

    Have you ever been to Amelia Island? Or is it one of those places you keep meaning to visit? I’d love to hear what you think — drop a comment below if you have tips or questions.

    Keep Reading

  • 7 Unique Things to Do in San Luis Obispo County

    7 Unique Things to Do in San Luis Obispo County

    There is something about central California that feels just right — not as hurried as the south, not as distant as the north. Last year, Sam and I drove out to San Luis Obispo County for an anniversary weekend, and we kept finding ourselves slowing down without meaning to. The kind of trip where you do not need a schedule, just good shoes and an appetite.

    Here are the seven things we loved most in SLO CAL — the little region between SoCal and NorCal that seems to have forgotten it is part of any bigger thing.

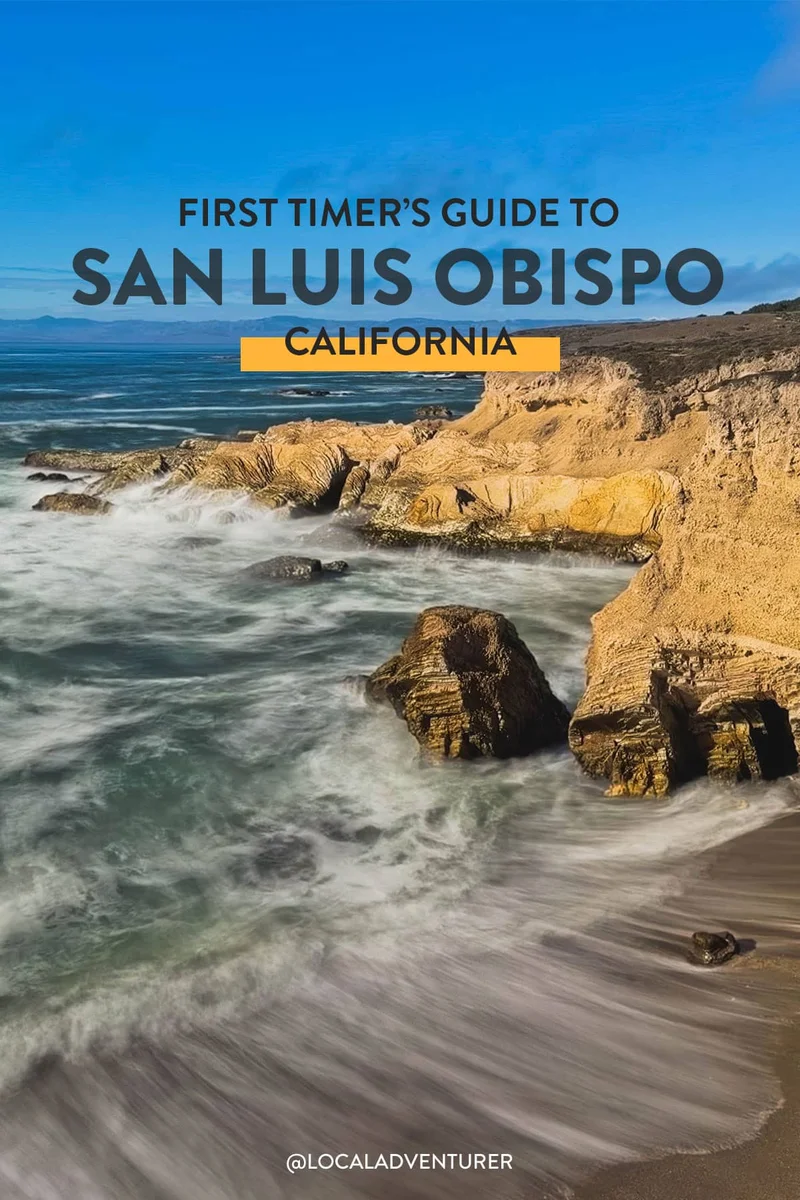
    San Luis Obispo coastal landscape with golden hills

    Sensorio – Art Made for After Dark

    4380 CA-46, Paso Robles

    Over 100,000 glowing bulbs arranged like bioluminescent flowers. The Field of Light is the original and largest exhibit, and since our last visit they added six more. We ended up favoring Dimensions by HYBYCOZO — all geometry and soft color, the kind of space you want to stand in without your phone for a minute.

    Go right before sunset so you can see the installations both ways: daylight and dark. They photograph beautifully either way.

    Glowing light bulbs at Sensorio Field of Light

    Sunset Gondola Ride in Morro Bay

    833 Embarcadero, Morro Bay

    This was the evening highlight. Our gondolier, Stephano, used to sing opera and teach music — now he glides around Morro Bay on his boat, the Gianna, telling stories as the buildings behind him light up in gold. It almost feels like a European canal once the sun goes down.

    They offer 3-course dinner cruises too, and night cruises if you want something quieter. Stephano is also an ordained pastor, which makes him one of the few people who can row you around AND marry you on the water.

    Metal Stamping at Junkgirls

    870 Monterey St, San Luis Obispo

    I made a metal-stamped bookmark with my name on it, a tag for Biscuit, and a ring from a recycled spoon. The whole place felt like art therapy — warm, unhurried, and deeply handmade. The founders, Melissa and Jenny, built the shop around healing through craft, and you can tell.

    Over 70% of the store’s items are made in-house. They also run junk journaling and monoprint workshops if you have time for a second session.

    Handmade metal-stamped jewelry at Junkgirls workshop

    Montana de Oro Bluff Trail

    35.258093, -120.887191

    The trail runs up to 3.9 miles with a 193 ft elevation gain, but you can turn around wherever feels right. We stopped at the first scenic overlook — I sketched for a while while Sam listened to the ocean and did his breathing exercises. The sound of those waves is genuinely calming; apparently it activates your parasympathetic nervous system.

    If you visit between February and April, the trailside California Poppies are worth the early start.

    Spare Time Books in Paso Robles

    945 12th St Suite C, Paso Robles

    I have been in my bookstore era for a while now, and this one earned a place on the list. Two friends bought it together and filled it with warmth — book clubs, events, even a Silent Book Club that feels made for introverts like me.

    Cozy interior of Spare Time Books bookstore

    E-Bikes and Picnic at Cass Winery

    7350 Linne Rd, Paso Robles

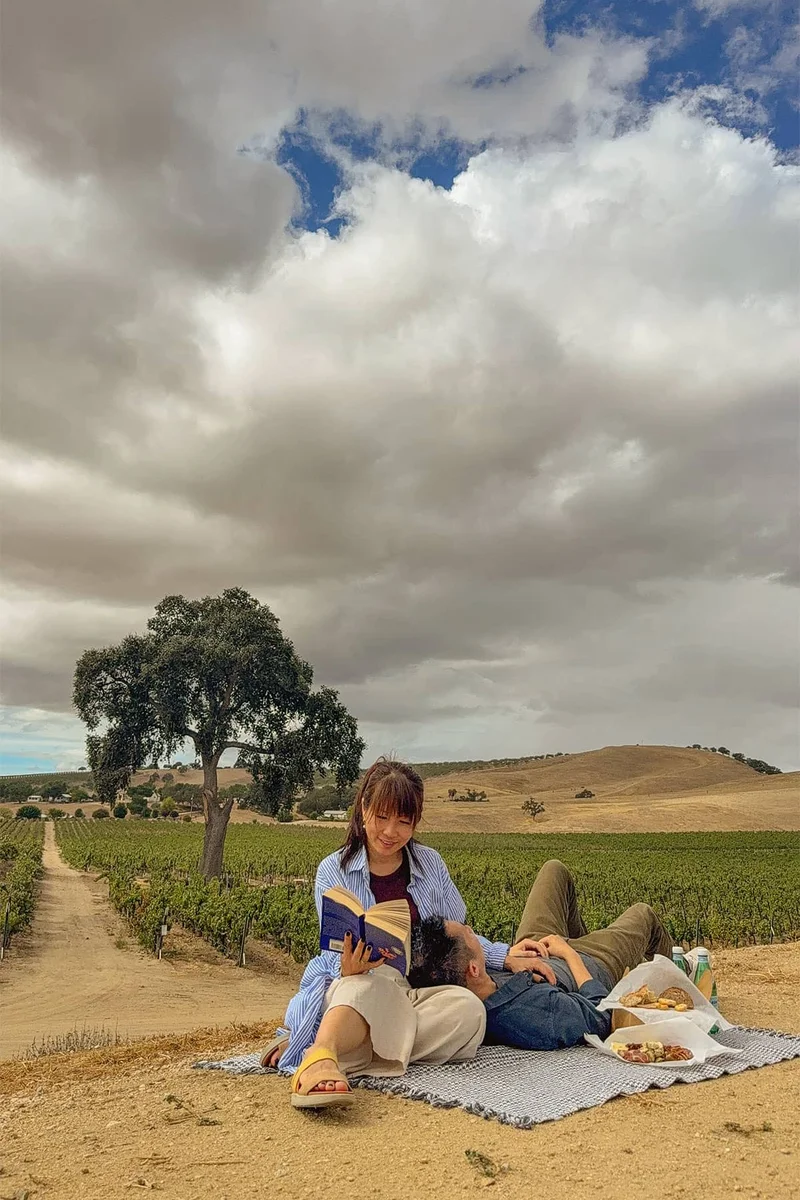
    Most wineries are not built for people who do not drink wine. We rented e-bikes here and rode through the vineyards while Sam checked out the views. Then we found a spot by the reservoir for lunch — just us, a blanket, and rows of grapevines stretching out in every direction.

    E-bike picnic overlooking Cass Winery vineyards

    Madonna Inn

    100 Madonna Rd, San Luis Obispo

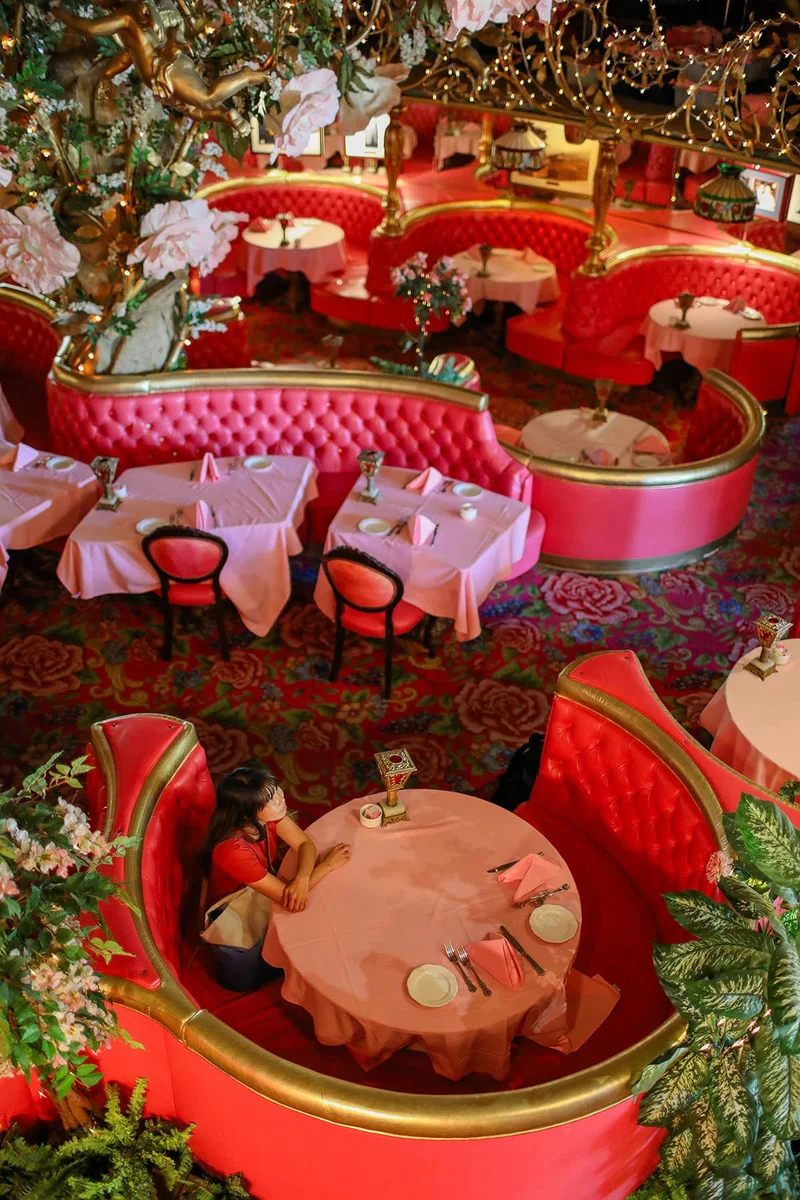
    Pink. Exuberant. Completely committed to its own vision. The Madonna Inn is the kind of place you stop at because everyone tells you to — and then you stay because the pink champagne cake is genuinely good.

    Pink exterior facade of the Madonna Inn hotel

    Where We Ate

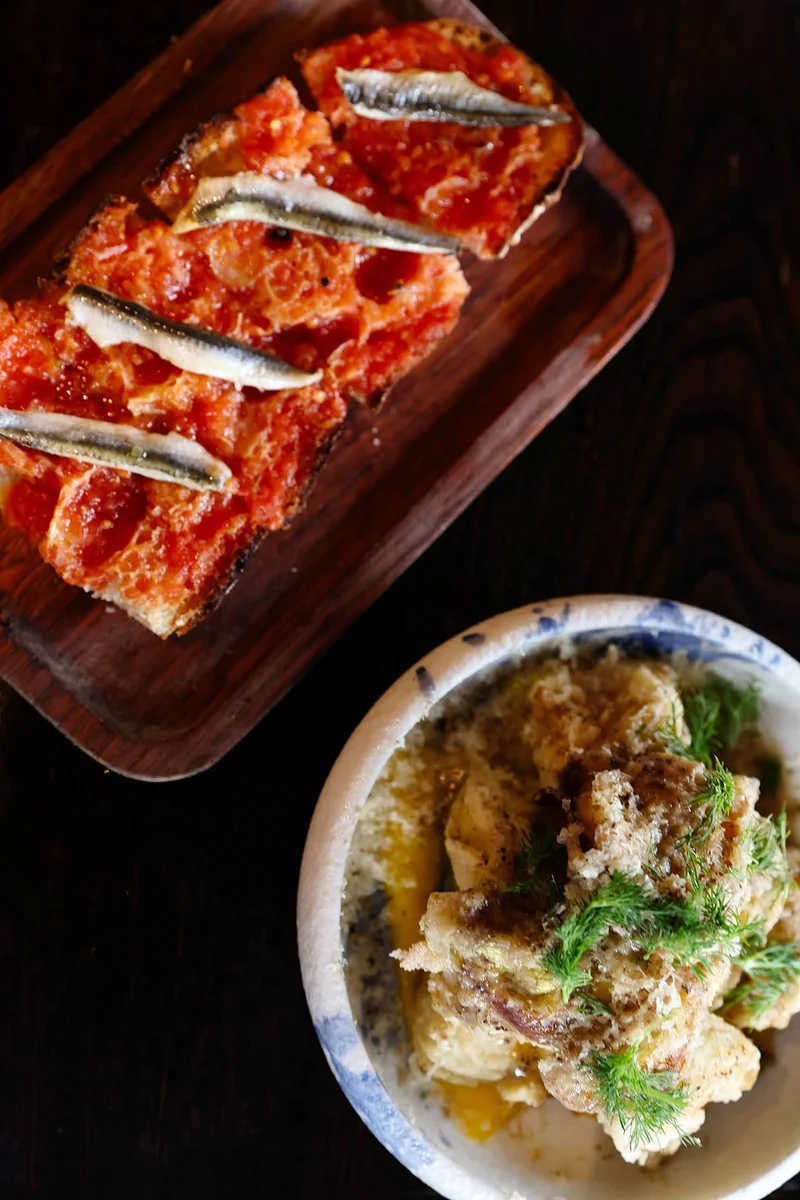
    S’aranella, Paso Robles – our favorite meal of the trip. Modern Spanish with tapas, pintxos, and paellas. The pan con tomate is still on my mind weeks later.

    Feral Kitchen & Lounge, SLO — upscale speakeasy vibes upstairs with creative cocktails and burgers worth the climb.

    Scout Coffee, SLO — my favorite coffee shop from the trip. There is a mural outside that makes you want to linger.

    Spearhead Coffee, Paso Robles — recommended by our server at S’aranella, and worth the detour.

    Mersea’s Seafood Restaurant, Avila Beach — more for the ocean view than the menu, but that view is hard to beat.

    Spanish tapas dishes at S'aranella restaurant Paso Robles

    Where We Stayed

    In SLO we stayed at The Butler Hotel — an old auto repair shop converted into a quiet hotel. Close enough to downtown to walk, far enough from the noise to sleep well. Check-in was entirely by text code; no front desk, no small talk.

    In Paso Robles it was the Paso Robles Inn, right next to the historic square. Spacious rooms, wandering paths on the property, and a short walk to Spare Time Books — which made my morning significantly better.

    A note from Nora

    Maybe that is what SLO CAL does best: it does not ask you to be an adventurous traveler or a slow one. It just lets you be whoever shows up, as long as you are willing to look at the sky once in a while.

    Keep Reading

  • Family Travel Insurance: What We Learned Before Our Next Trip

    Family Travel Insurance: What We Learned Before Our Next Trip

    A friend called me last spring while stuck in an airport lounge in Dublin. Her daughter had woken up with a fever, their connecting flight was cancelled, and she was trying to figure out if her American health plan covered anything at the nearest clinic. She sounded exhausted in that particular way only parents know — the kind where you are doing three things at once and none of them feel like they are working.

    I thought about that call a lot while Sam and I were booking our next family trip. We had spent weeks comparing flights, reading hotel reviews, and arguing over whether to pack Biscuit’s favourite toy for the car ride (we did). But there was one thing on the checklist we used to skip: travel insurance.

    Not anymore. After years of travelling just the two of us, then adding our daughter into the mix, I have come to see family travel insurance as non-negotiable. It is not about expecting disaster. It is about protecting the time, money, and energy you pour into a trip that probably took months to plan.

    Family Travel Insurance: What We Learned Before Our Next Trip - photo 1

    Why Family Travel Insurance Actually Matters

    Family trips carry higher stakes than solo travel. More people means more moving parts, and usually a much bigger upfront investment. Here is why I will never skimp on this again:

    • The costs add up fast. Flights, hotels, tours, activities — for a family of three or four, we are talking thousands of dollars before you even book. Cancel one day before departure and the financial hit is real.
    • Kids get sick at the worst possible moment. A fever the night before the flight or a stomach bug mid-trip can derail everything. One evening last year, our daughter spiked a temperature two days before a weekend getaway, and we had to choose between pushing through or cancelling. Insurance covered both options.
    • Delays multiply quickly. One delayed flight means meals, hotel nights, and transport for everyone, not just one person. A four-hour delay with three hungry people is its own kind of adventure.
    • Lost baggage is harder with littles. Replacing clothes, medications, and the things you cannot live without on the road is exhausting enough on your own — now imagine doing it while holding a toddler.
    • Most domestic health plans barely cover you abroad. Many families assume they are protected until they discover the hard way that their everyday insurance offers little to nothing overseas. In the US, standard plans rarely include international emergency care. If you are travelling from the UK or EU, your NHS coverage or European Health Insurance Card helps within Europe, but it does not extend to non-EU destinations.

    Trip Protection vs. Travel Medical Insurance

    One of the most common points of confusion is the difference between these two types of coverage. They sound similar, but they are not the same thing.

    Trip protection covers the logistics of your journey:

    • Trip cancellation for covered reasons (illness, severe weather, job loss)
    • Trip interruption if you need to cut a trip short
    • Travel delays — meals, lodging, and transport while you wait
    • Lost or delayed baggage

    Travel medical insurance covers your health:

    • Emergency medical treatment
    • Hospital stays
    • Emergency medical evacuation — which can cost $25,000 to $75,000 on its own
    • Round-the-clock travel assistance services

    Many family plans bundle both together, though coverage amounts and limits vary. A typical comprehensive plan for a family of four might run between $300 and $800 depending on the trip cost and destination — not cheap, but nowhere near the cost of an uncovered emergency.

    What I Like About Family Vacation Insurance

    Covering multiple travellers under one policy keeps paperwork and claims simpler. When you are already juggling kids, schedules, and a carry-on that somehow holds everything and nothing at once, fewer forms to fill out is worth something.

    I also appreciate the flexibility. You are not locked into a one-size-fits-all option. You can choose your deductible, coverage length, and overall limits based on how your family actually travels. For our last trip, we picked higher medical limits because we were going somewhere remote. No skydiving for us, so we skipped that add-on.

    Atlas Journey: What It Covers

    This post was written in partnership with WorldTrips. All opinions are my own — I just want to help you make confident travel decisions, the same way I try to figure things out for myself before every trip.

    For US residents, Atlas Journey is WorldTrips’ primary trip protection plan, and it works well for families. Depending on the plan level, it can include:

    • Trip cancellation and interruption benefits
    • Travel delay coverage
    • Baggage protection
    • Emergency medical benefits (varies by plan)
    • 24/7 travel assistance — which is more useful than it sounds when you are in a foreign country at 2 a.m.

    This kind of coverage fits well for family cruises, international vacations, or any trip booked far in advance where the financial commitment is meaningful.

    Optional Add-Ons Worth Considering

    Some trips call for extra flexibility, and there are two upgrades I think about every time we plan something big.

    Cancel For Any Reason (CFAR) is an optional upgrade on select plans. Your standard trip cancellation benefit reimburses you only for reasons listed in the policy — illness, severe weather, that sort of thing. CFAR goes further: it allows partial reimbursement, typically 50% or 75%, if you cancel for reasons not covered by the base plan, like a change of heart or general concerns about travelling.

    There is an important catch. CFAR usually must be added within two to three weeks of making your first trip payment. For our last cruise, we booked flights six months ahead and added CFAR that same week — glad we did, because Sam’s work schedule shifted and we were able to recover 75% of the cost when we postponed.

    There is also a Pet Care upgrade, which can provide cancellation coverage if your pet falls ill or passes away before the trip. If you are bringing your furry friend along, it covers vet costs on the road too. We have not used this one yet — Biscuit’s travel adventures so far have been limited to the car — but I keep it in mind for future trips.

    Family Travel Insurance: What We Learned Before Our Next Trip - photo 2

    Filing a Claim: What to Expect

    No one enjoys dealing with insurance claims, but knowing what to expect helps more than you would think. Here is what I have learned:

    • Claims require documentation — keep receipts for everything, medical reports from any doctors you visit, and written proof of delays (airline emails count).
    • Read your full policy documents before you travel, not when something goes wrong. I know this sounds tedious, but skimming the coverage details once at home saves hours of stress later.
    • A little organisation upfront — a folder on your phone for photos of receipts, for example — makes the whole process less painful.

    How to Choose the Right Plan for Your Family

    Family travel insurance is not about finding the cheapest option. It is about finding the right fit.

    Think of it like booking flights. You would not choose a route with three layovers when a direct flight exists, and you would not pick a motel near the highway when a comfortable hotel is within budget. Insurance works the same way.

    When comparing plans, start here:

    • Decide what type of insurance fits your trip best. A weekend road trip needs different coverage than a three-week international adventure.
    • Prioritise the benefits that matter most to your family. If you are travelling with young kids, medical evacuation might be worth more than baggage protection.
    • Choose coverage limits and deductibles that match your budget. Know how much you could comfortably pay out of pocket if something went wrong — then build from there.
    • Read the fine print on exclusions. Pre-existing conditions, high-risk activities, and trip duration caps vary between providers.

    A Final Thought

    Family travel insurance is not about expecting the worst. It is about giving yourself breathing room when plans change — because they always do.

    Trips with kids are full of moments you will carry for years. They are also full of unexpected detours, last-minute cancellations, and the kind of chaos that makes you laugh in hindsight but stress over in real time. Having the right coverage in place won’t stop things from going wrong, but it can make those stressful situations feel manageable instead of overwhelming.

    Read the policy details carefully and choose a plan that reflects how your family travels. When you are far from home with the people you care about most, that peace of mind is worth every cent.

    A note from Nora: The first time we bought travel insurance for a family trip, I told Sam it was probably unnecessary. Two weeks later, our flight got cancelled and we spent an unplanned night in Chicago. We ended up at a diner on Grand Avenue eating pancakes at midnight while our daughter drew on the place mat with a crayon she found under the booth. It turned into one of my favourite travel memories — but only because insurance meant we could afford to roll with it.

    Keep Reading

  • How I Got My Visa to France

    How I Got My Visa to France

    I fell in love with France the first time I visited Bordeaux back in 2010. Friends from a trip in Thailand showed me around, introduced me to the food and the wine, and somehow managed to make an entire country feel like home before I had even seen half of it.

    Then came Paris. Stepping out of that metro station onto the Champs Elysees — the lights, the energy, the sheer weight of history in every direction — something shifted inside me. It was as though I had always known that city and was finally coming back to it.

    How I Got My Visa to France - photo 1

    Paris has not let go since. Over the years, I kept returning, spending months at a time exploring neighborhoods I could never quite map in my head. In 2019, I even lived there for a few months.

    Last August, after another trip, it hit me: what if I moved back?

    I was feeling worn down by the pace of everyday life at home, creatively stuck, and honestly not sure what came next. Sam understood — he always does — and we started talking about what a change of scenery might do for both of us.

    France made sense. It is cheaper than most American cities I could name, I already had friends there, I have wanted to learn French forever, and it would be the perfect base for exploring the rest of Europe. Plus, writing from a cafe in Paris has always felt like one of those things you picture yourself doing someday.

    But how exactly do you move to France?

    The four visa options

    France does not have a digital nomad visa, and the standard Schengen tourist visa caps you at three months. So if you want to stay longer, there are four main paths:

    • Student visa
    • Long-term visitor visa (VLS-TS visiteur)
    • Entrepreneur visa
    • Talent visa

    The student visa is the most straightforward. You enroll in a full-time program at an accredited school and show you have enough funds to support yourself — around 600 Euros per month. A friend of mine is on this right now, doing a nine-month intensive French course. The nice part: you can work part-time on it. The catch? If you leave the program, the visa gets voided. After finishing, though, you can switch to a job-seeker visa for up to six more months.

    I considered the entrepreneur visa but found the process daunting. You have to set up your business in France, show it makes money with at least one French client, and prove it supports you at minimum wage level or above. The authorities scrutinize your finances closely, and you need to register the business and pay French taxes. All of that takes months.

    Then there is the talent visa, aimed at people who are recognized experts in their field — think academics or artists with verifiable credentials. You would need to show how your work contributes to French culture and demonstrate a source of income. It is solid for someone planning a long-term stay where they physically work.

    Both the entrepreneur and talent visas sounded thorough, which is another word for time-consuming. Since I was not sure France would be my forever home, I did not want to lock myself into that kind of process.

    The path I chose: VLS-TS visiteur

    I went with the long-term visitor visa — officially called the VLS-TS visiteur. It lets you stay in France for up to 12 months and can be renewed from within the country, pretty much indefinitely. A lot of Americans (and most retirees) use this one.

    The trade-offs are real: I cannot physically work here, and I am not part of the French social welfare system. But it does allow me to open a bank account, and if you have passive income or savings, it is a perfectly viable way to live in France long-term.

    Can you work remotely on this visa?

    This was my biggest question. The French government has not built a system that catches up with remote work yet. They define “work” as something you do physically — the kind of job that could take a position away from a French person.

    Could I run walking tours in Paris? No. Could I work at a cafe? No. But does writing this blog count as work? What about a weekly newsletter with affiliate links?

    The gray area is considerable. The French tax office said last July that remote work is considered taxable, but there are no official laws codifying that — it is their opinion and nothing has moved on the legal front since. My visa does not even come with a tax number, so technically I could not pay taxes even if I wanted to.

    When the visa office asks how you will support yourself, “income from work” is one accepted source. I was completely open that my income comes from this blog and my writing projects. It worked out fine.

    The best thing to do is talk to a lawyer. I recommend Daniel Tostado — yes, that is his real name — one of the largest American-French immigration firms in Paris. He meets regularly with government officials to clarify exactly these kinds of rules and gave me solid advice.

    The application process

    Getting this visa turned out simpler than I expected. Here is how it works:

    1. Fill out your application on the French government website.
    2. Take the application number to TLScontact and book an appointment (France outsources appointments to them).
    3. Show up with your documents. They check everything, take biometrics, collect fees, and send your passport to the embassy.

    The main things you need to prove are that you have accommodation for at least 90 days and enough income to support yourself. The authorities just want to make sure you will not become a burden on their system.

    What I brought to my appointment

    I tend to over-prepare, so here is what I took with me:

    • A printed copy of the application
    • Appointment confirmation
    • Extra passport photos
    • Proof of accommodation (Airbnb, hotel, or a friend’s home — if it is someone else’s place, they need to own it)
    • A letter stating I would not work in France
    • A financial summary explaining why I am moving and where my income comes from
    • Health insurance meeting French requirements (I used Mondassur)
    • Three months of bank statements showing regular deposits
    • A second bank account, my tax returns, and my W-2

    The second bank account, tax returns, and W-2 were not required, but the woman at the appointment said more proof never hurts. Another friend of mine managed with only what the form asked for. I just did not want to take any chances.

    Waiting for approval

    Officially, processing takes up to 15 days. In practice, everyone I know got their passport back within a week.

    The hardest part is the waiting itself — you do not know whether you are approved until your passport is returned. I found myself scrolling through Reddit threads, and most denials came down to two things: insufficient income proof or accommodation issues. Get those right and you are in good shape.

    Once you have your visa

    You can enter France any time after the start date printed on it. After arrival, you have 90 days to register your visa with the state — they include a QR code with instructions when you get your passport back. It is mostly paperwork from there.

    Once that registration is done, there is nothing else to do. You stay in France (and can travel through Europe) until your visa expires.

    A note on all of this

    If you are thinking about moving to France, these options should give you a starting point. But I am not a lawyer and this is not legal advice — always seek counsel from an immigration professional for your specific situation.

    Have you ever considered living abroad on a long-term visitor visa? Or does the paperwork alone make you want to book a three-week trip instead? I would love to hear what you think in the comments.

    Keep Reading